
|
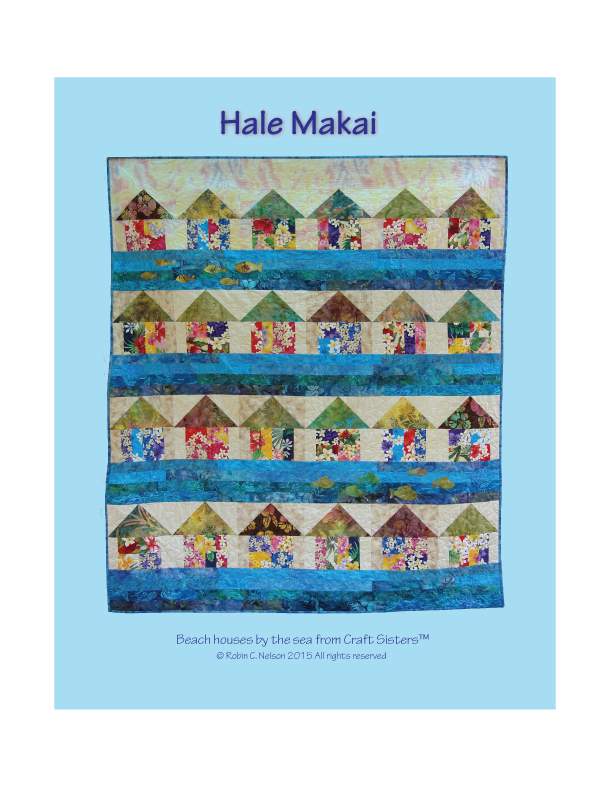
Here's the beach house row pattern. Managed to finish it in time for World Wide Quilting Day on Saturday the 21st. Are you celebrating? Previous post has more quilt pictures and how it was made. Click and download the .pdf file then print out instructions. Hope you have fun with it and or pass on to a quilting friend.
5 Comments
Here's what I ended up making out of those gorgeous batiks and Hawaiian prints from an earlier post. This is an easy beach house row quilt. There are two different, pieced, houses using Hawaiian floral prints for house bodies and batiks for the roofs. Rows in-between the houses are a variety of blue batiks sewn into strips. I added some small appliquéd fish to two of the rows for fun. The shapes are simple and easy to appliqué. Eventually, a free downloadable pattern for this will be posted in case you want to try it. My Hawaiian version finished out at approx 72" x 84" or twin size. The house blocks are 12" square finished. Any fun, beachy, fabrics and batiks would work for this. 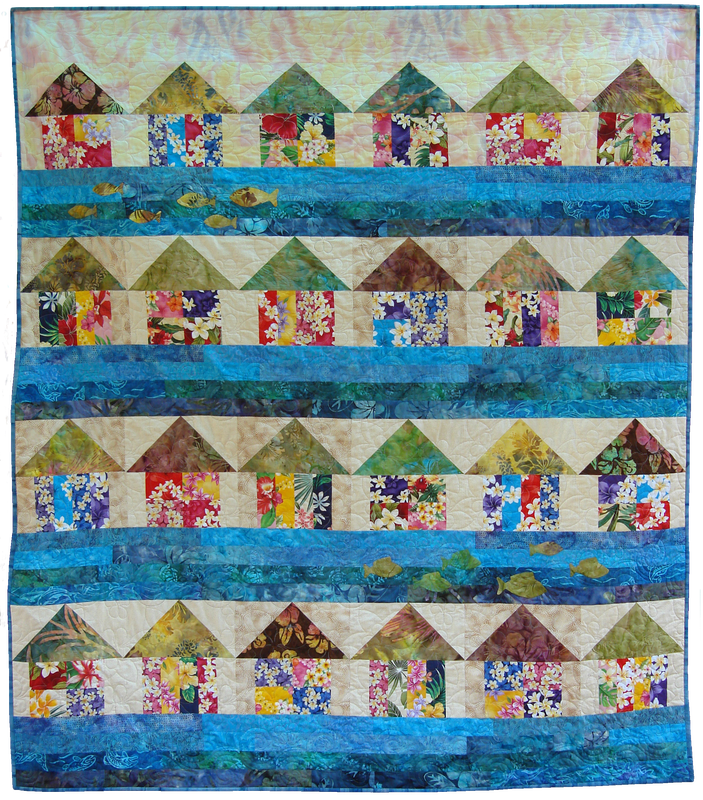  Scraps from the roof fabrics were used to make the fish. An overall Plumeria pattern was quilted on the house and background rows. Watery swirls over the water and fish rows.  Just letting you know Craft Sisters is taking a vacation and going off the grid for a week. No kidding, no phones, no email. Whew... it will be so nice. While we're away, you can still order and download patterns. Paper patterns ordered during that time, 2/17 - 2/24, will be shipped on Wednesday 2/25. We'll return messages on that day too. Thanks so much for your business and patience. 
Here are a few ideas for all you Twelves' sewists out there. You can make Twelvina from any sock doll pattern and scraps of other materials. I was lucky enough to find green and white socks. Dress her up and add all kinds of embellishments. I know you can think of a lot more than this. Her hair is left over yarn and sparkly ric rac. She has yo yo eyes with a bead in the center, embroidered eyelashes and star buttons on her toes. The tulle skirt is gathered and sewn on to ric rac then tied on in the back. Her lips are made from an old shirt and stuffed to make them extra voluptuous. Pom pom is from scrap yarn along with the leg warmers. Her 12 shirt is made from scraps of one of my son's team shirts. She is sitting on a quilted table runner made with flying geese blocks and appliqued 12s at each end. Hawk motif fused and appliqued. She makes a fun centerpiece for your game day table. 

Take apart a paper grocery bag to use as the pattern for the grocery tote below. The bottom of this one is a sand bag that you can get at hardware or farm stores. Hopefully that makes it extra sturdy. Use team fabric for the top, lining and handles. 
The colors in these prints and batiks are saturated. Florals so Hawaiian and fun, were in my stocking. Thank you Santa! All the fabrics came from Kapaia Stitchery in Lihue, HI., island of Kauai. http://kapaia-stitchery.com If you ever have the opportunity, be sure to visit them. The plan for this is a row quilt of a sort. It's exciting to get started (already cutting the navy blue floral and sandy looking background fabrics). My way of visiting the islands this winter. Time to turn on the island music and sew... 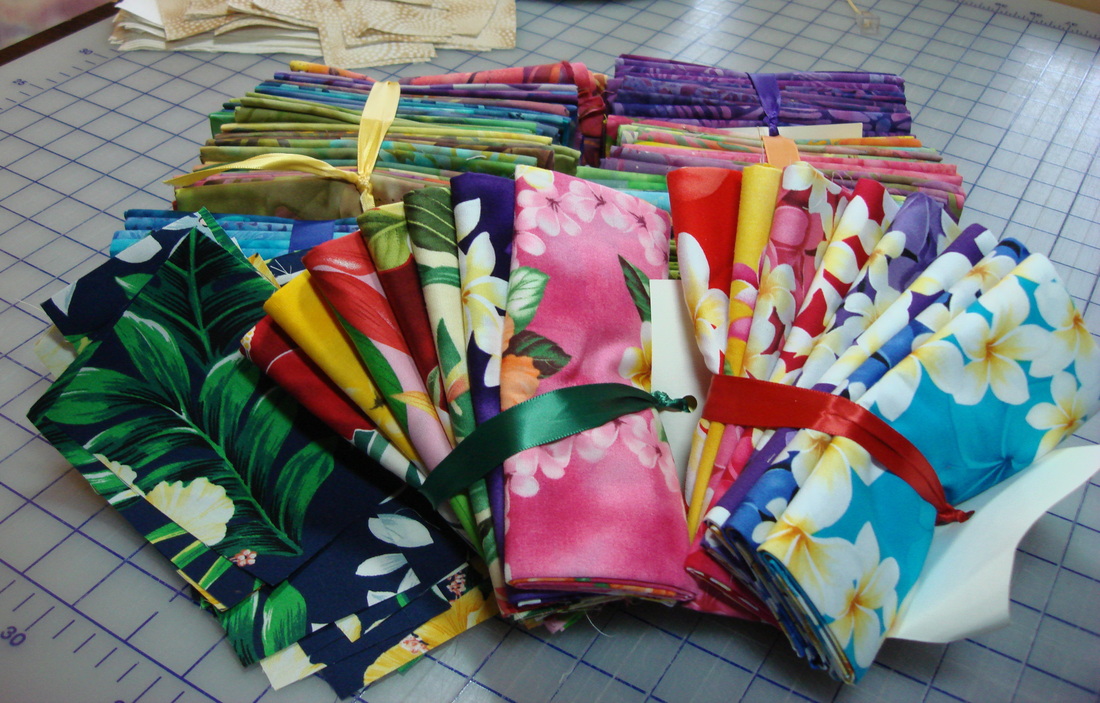
Hey Merry Christmas from the North Pole League. The start of this quilt was made by enlarging one of the baseball card appliques from a quilt pattern we did in 2003 (baseball at the north pole theme). With this one, I kept adding strips around the card, trying to use up leftover Christmas fabrics. I thought it would be fun to try delectable mountain blocks for the final border and was lucky enough to have enough fabrics. It Was fun and the blocks are really easy to make using half square triangles. After adding all the strips and borders, this quilt is somewhere around queen size. The baseball card center is about 48" tall enlarged from a 5" x 7" original. Whoops... forgot to measure the baseball bats and ball. This one's a gift for my son's Christmas birthday. You can't see it in the photo but it's quilted with an overall snowflakes pattern. We plan on re-releasing the North Pole League applique patterns sometime next year. Happy Holidays everyone! 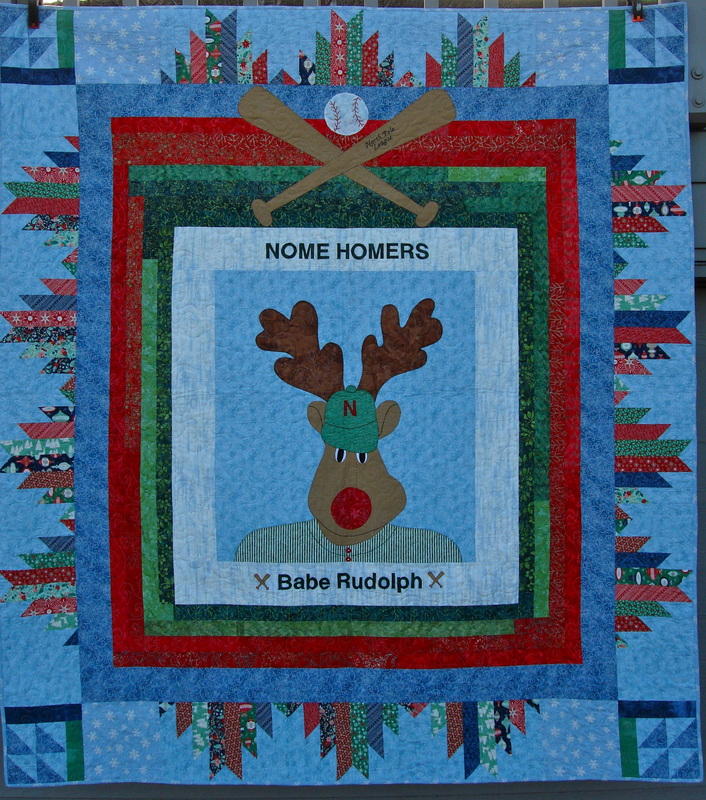
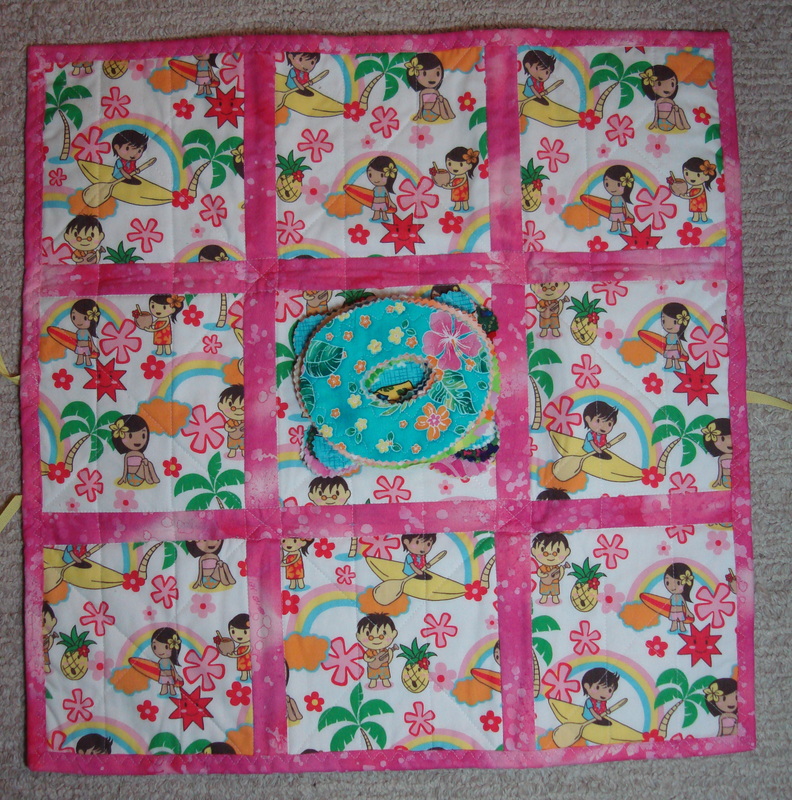
Here's an easy quilted tic tac toe game for toddlers. All kinds of fabrics can be used for this, just make sure they are bright and fun. Any shapes can be used for the game pieces. The one pictured below has a monkey theme with sock monkey heads and banana shapes. I made another one with X and O game pieces. Download and print out the free instructions at the bottom of this post. Monkey head and banana shapes are included. 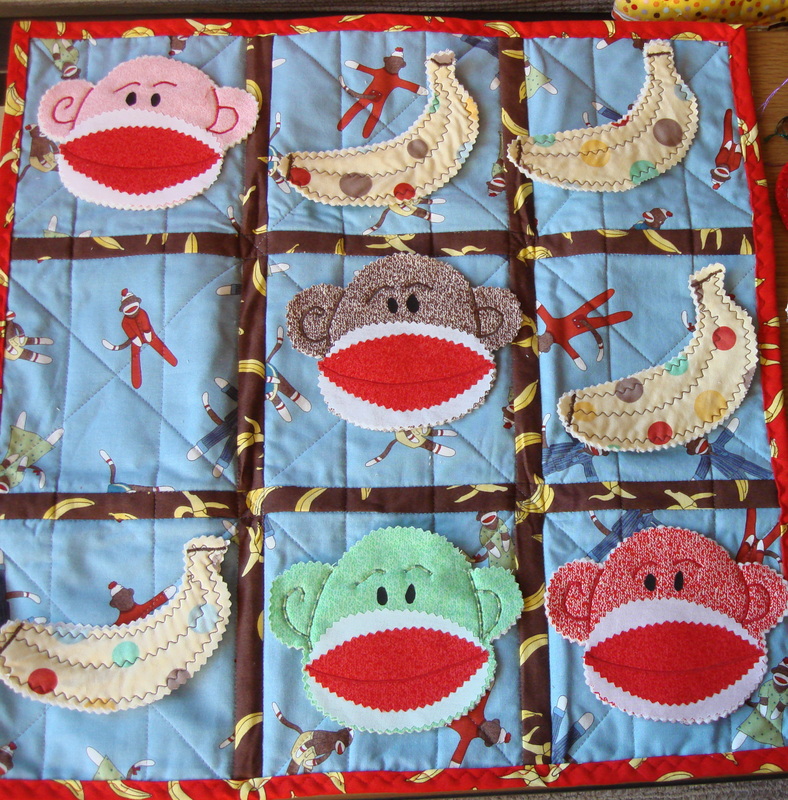
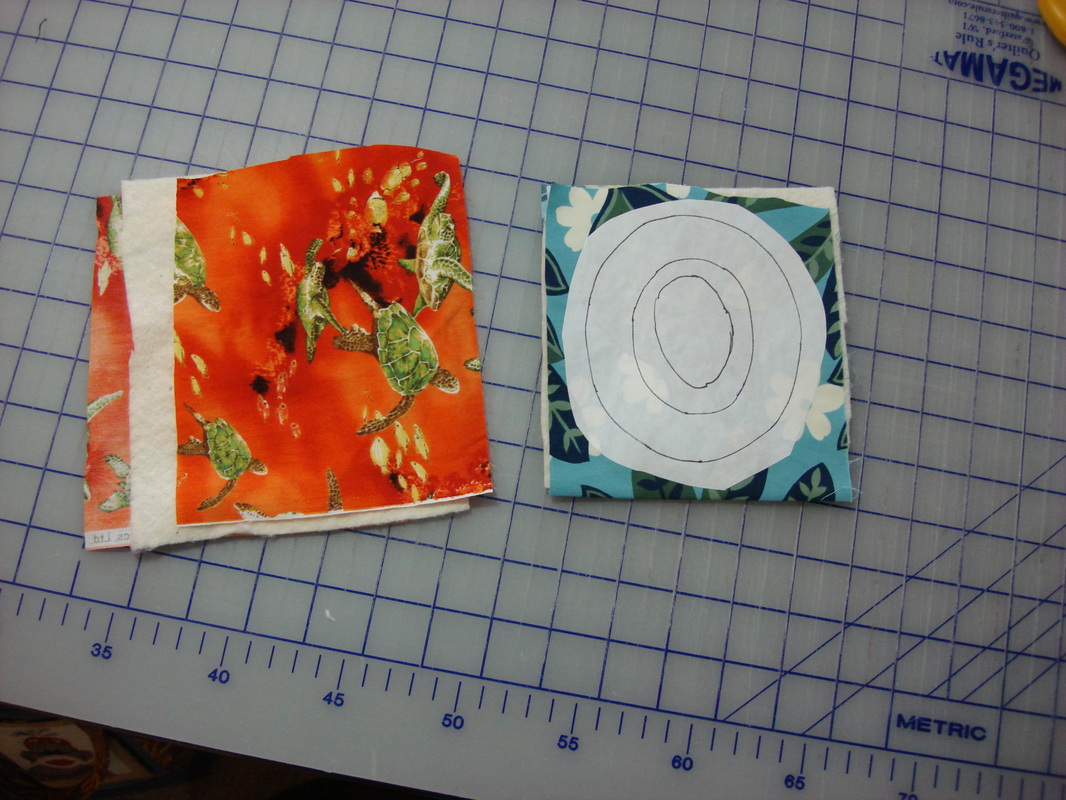
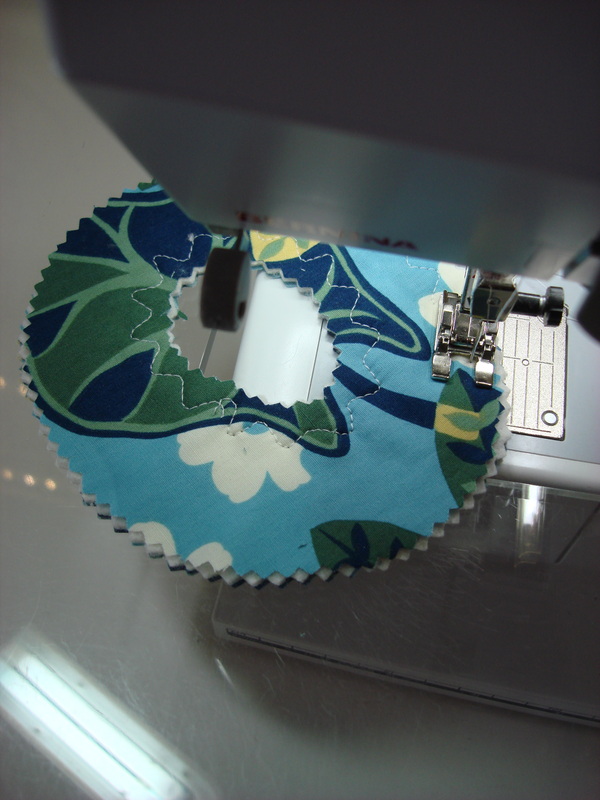
Pinking Shears 9 - 6.5” squares 1 - fat quarter for backing 6 - 1.5“ x 6.5” for sashing between squares 2 - 1.5“ strips x width of rows sewn together Scraps of low loft batting and fabric for Xs and Os 30” grow grain ribbon Make a big nine patch block with sashing in between for game board. Sew it together, pressing as you go. Piece together a backing or use a fat quarter. Make a quilt sandwich of backing, batting and top. Quilt as much as you like. In the ditch along the binding/sashing strip edges, Xs across the diagonals of the 6.5” squares. Trim and bind this little quilt. 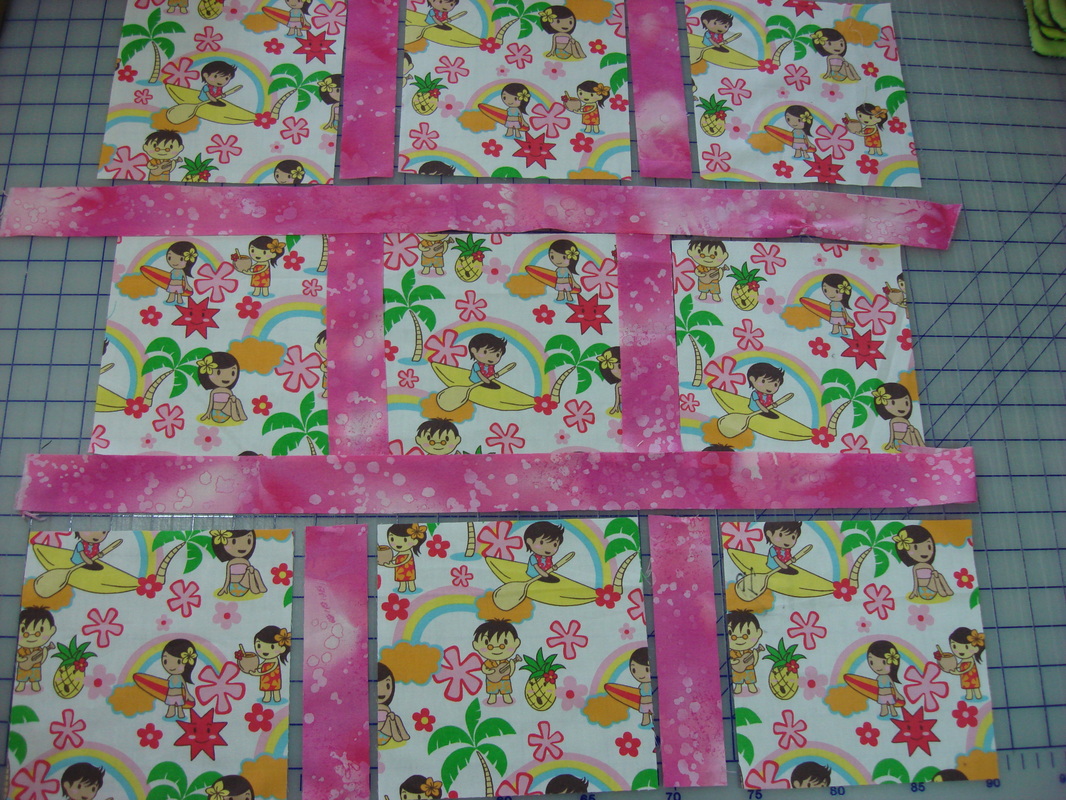
I'm excited to share this new pattern with you. Ichimatsu Mountain Home. Think Sunbonnet Sue with Asian flavor. You can use your stash of beautiful Asian prints in large and small scale to make the quilt. Or take a look at the beautiful lines of Kona Bay Fabrics and Hoffman. The Ichimatsu Doll appliqué, mountain blocks, and house block can be used for other future projects too. I was thinking it might be fun to do an Indigo table runner with the Ichimatsu Doll stitched out in Sashiko. Pattern is available here in PDF download format. Hope you have fun with it. 

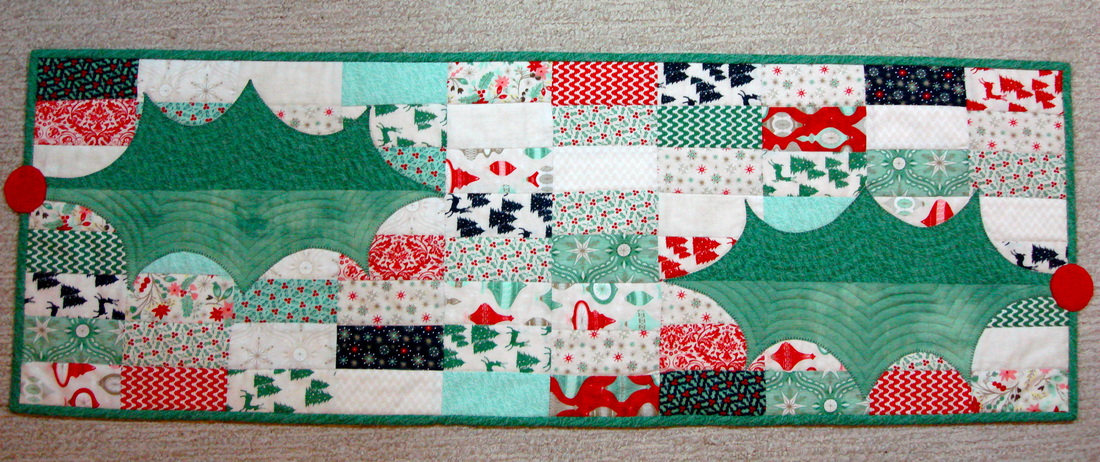 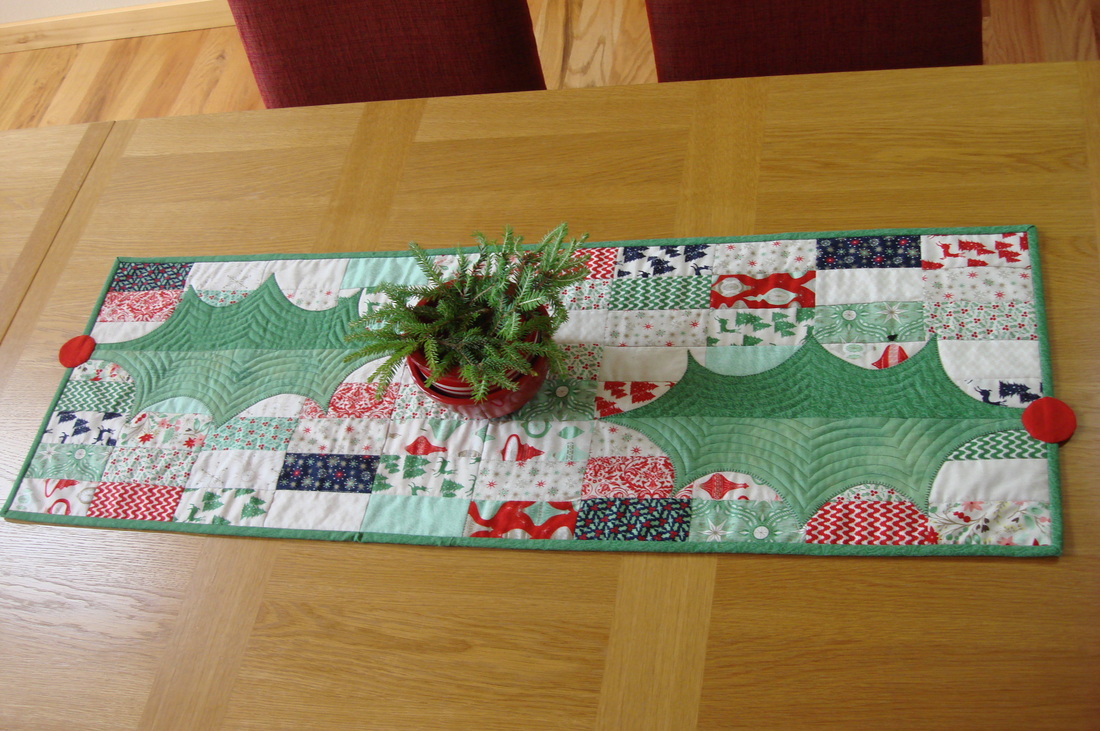 Be sure to visit the Moda Bake Shop today and download Holly on 25th and Pine. I'm excited to be sharing another pattern with you. It's an easy table runner with holly leaf exclamation points and a good way to use up scraps from your stash if you like. I had fun making it and hope you will too. The 25th and Pine line is by Basic Grey from Moda and this pattern uses either two Charm Packs or a Layer Cake.
I've been on a sock monkey kick again... After making a couple of baby quilts, it must be time for some Christmas tree ornaments. They're kinda funky but I'm sure the granddaughter will like them if no one else. To make these, I used the Sock Santa, and Rudolfarilla applique template patterns from my first post on the Moda Bake Shop.There is also a template for Moda Elf which I haven't done yet. http://www.modabakeshop.com/2011/12/sock-santa-modaelf-rudolpharilla.html#more 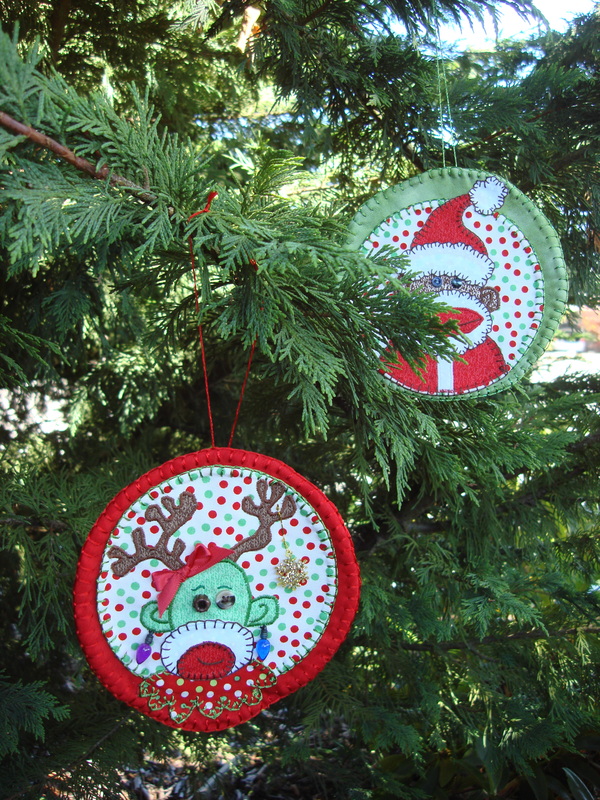
There is definitely some work in these but they're kinda fun and funny looking peeking out from the tree. 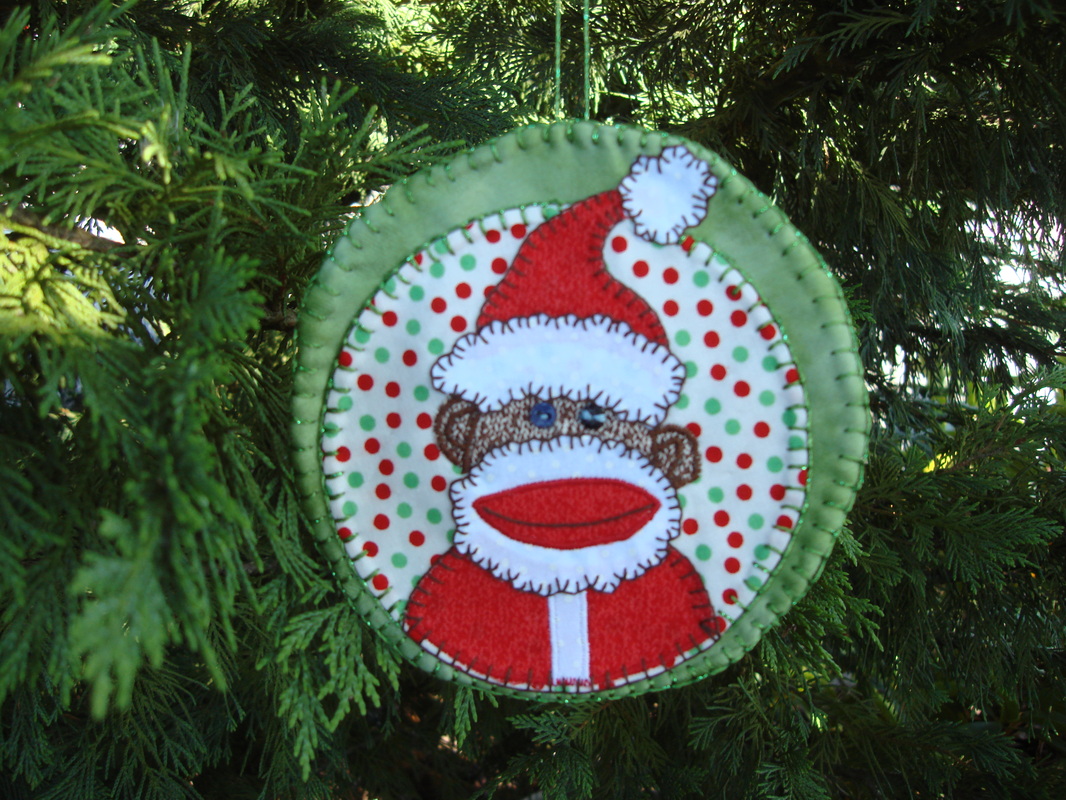
Here's how these were made. Circle background 1 - Cut 3, 6.25" circles, 2 fabric and 1 cotton batting. Layer the fabric circles right sides together, fabric on top of batting circle. Pin and sew around the circle leaving a small opening. Turn right side out, smooth seam with a chopstick and press. Close opening with whip stitch. Applique Background 2 - Trace a 5" diameter circle on sew in interfacing. Lay interfacing on top (right side up) of applique background fabric. Shorten stitch length to 15-18 stitches per inch and sew around circle on drawn line. Trim around circle, 1/4" seam allowance. Cut slit in interfacing only and turn circle right side out.Smooth seam and press. Reduce the applique templates by 50% so they end up being approx. 4" tall. Trace reversed templates on to fusible webbing and fuse to wrong side of applique fabrics. Cut out appliques on drawn line, remove paper and fuse pieces together using an applique pressing sheet. Carefully peel assembled applique from the pressing sheet. Fuse to background 2 except for anything that hangs over on to 1st background. You can download and follow the instructions for assembling appliques from the original recipe. http://www.modabakeshop.com/2011/12/sock-santa-modaelf-rudolpharilla.html#more Most of the embellishment for these is done on background 2. Interfacing and anything you don't want to show will be covered when ornament is finished. The interfacing makes a nice stabilizer if you want to outline the characters in satin stitch. I also added some hand blanket and stem stitch for fun. Fuse any pieces that hang over to background 1 (like Santa's pom pom) last. Button eyes, tiny light button earrings and a ribbon are used for Rudolfarilla. Oh and a little gold snowflake found in the button box for some sparkle. Sock Santa has one button eye and a bead for the other. I finished by stitching background 2 to background 1, using blanket stitch and metallic embroidery thread. Then one more time around on first background edge with blanket stitch and a piece of embroidery thread is used for the hanger. 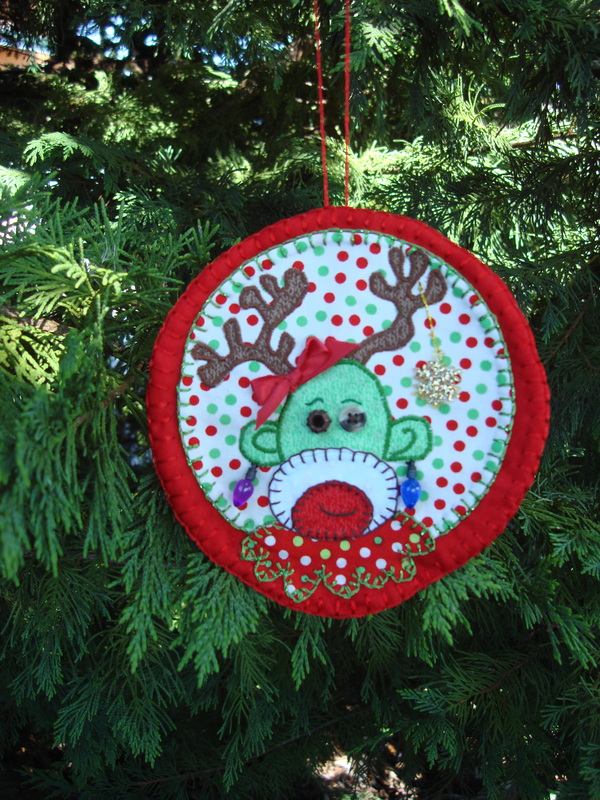
|


Archives
July 2023

|
||||||||

 RSS Feed
Home The Pattern Store Robin's Blog Contact Copyright 2002-2024 Robin C. Nelson All rights reserved