
|
Here it is! A new quilt pattern with options to use either blossom or honu appliques. Below are a few more pictures and a link to the pattern if you'd like to try it. The appliques and stitching in the borders make this quilt. Applique instructions are for fusible but whatever method works for you is best. I prefer the interfacing method or sometimes needle turn. My February 2022 post shows how to make appliques using the interfacing method. This quilt is fun made with the Hawaiian fabrics (Kapaia Stitchery) shown but also fun in almost any others. I recently made the blossom version with Tilda fabrics and Big Stitch quilting. Sweet! 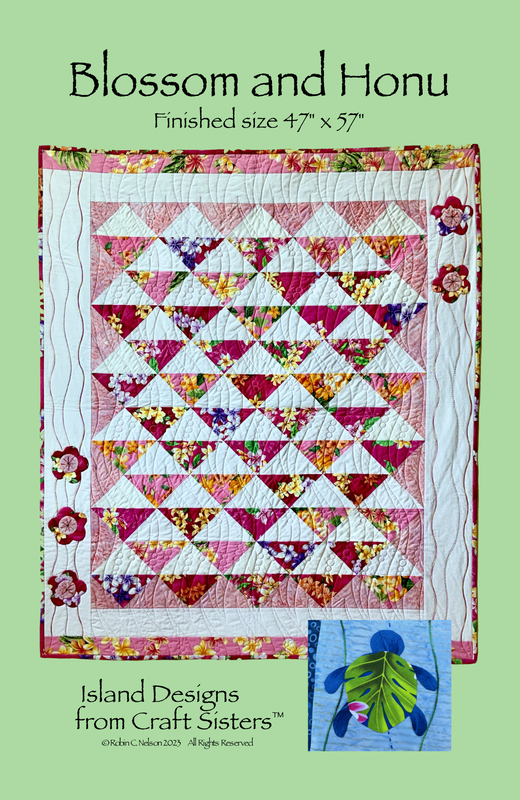 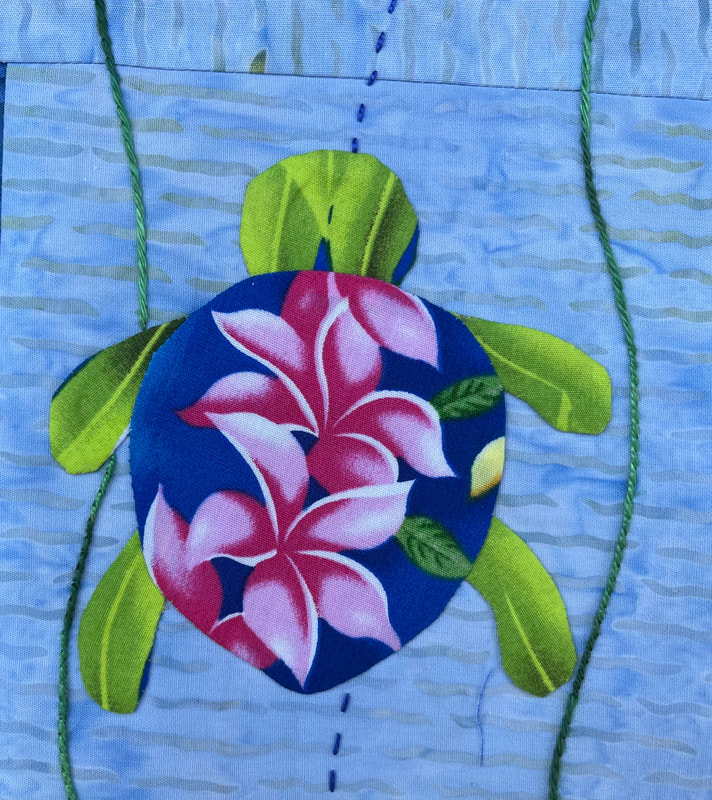 Fussy cut the turtle backs, heads and legs for extra cuteness! 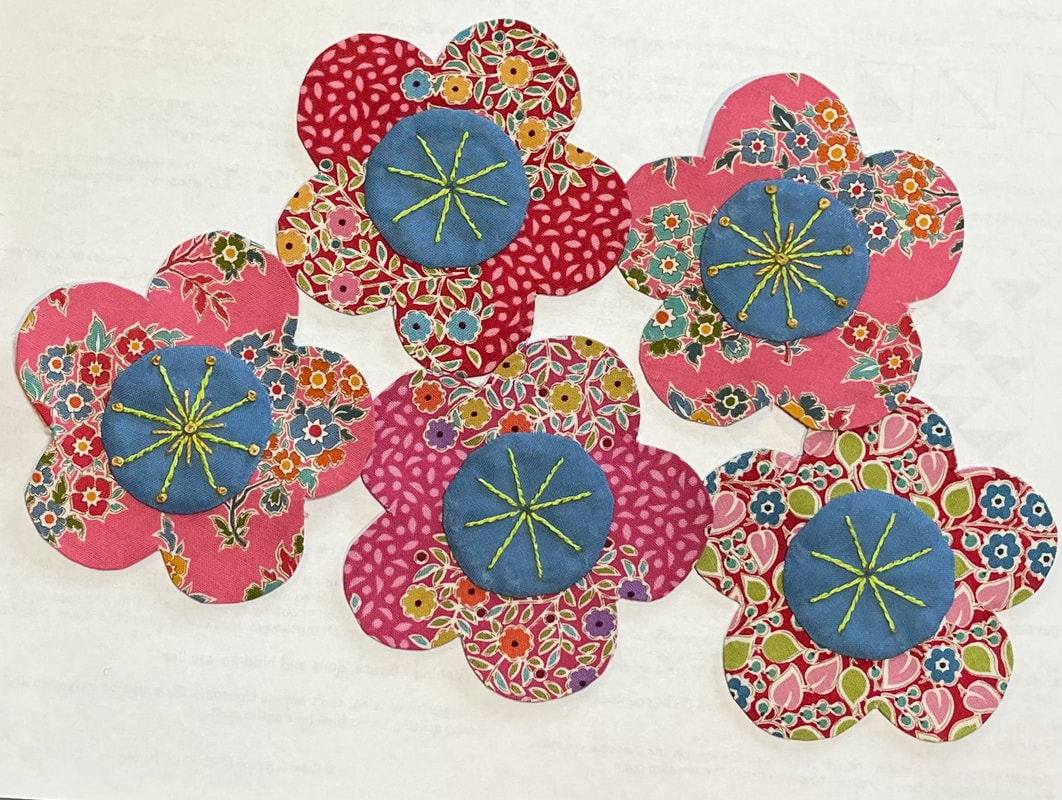 Use perle cotton or embroidery thread to add detail to blossom centers. I use a Hera tool and a wave ruler to mark wavy lines for embroidery. 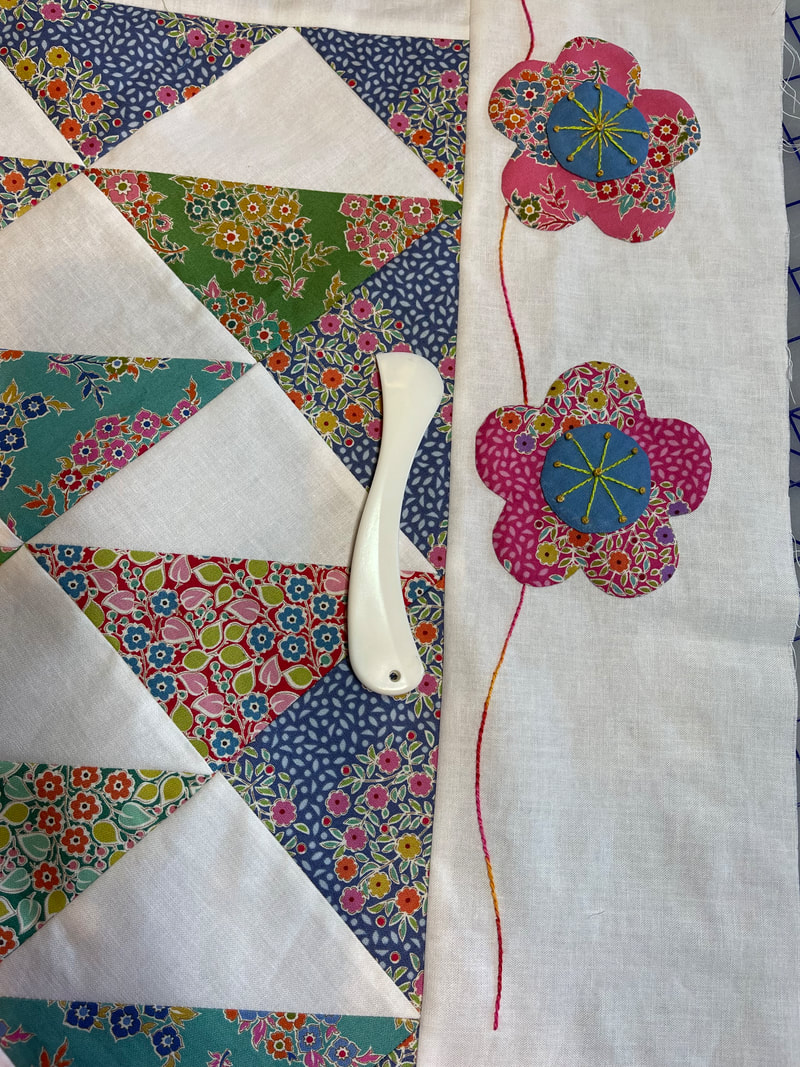 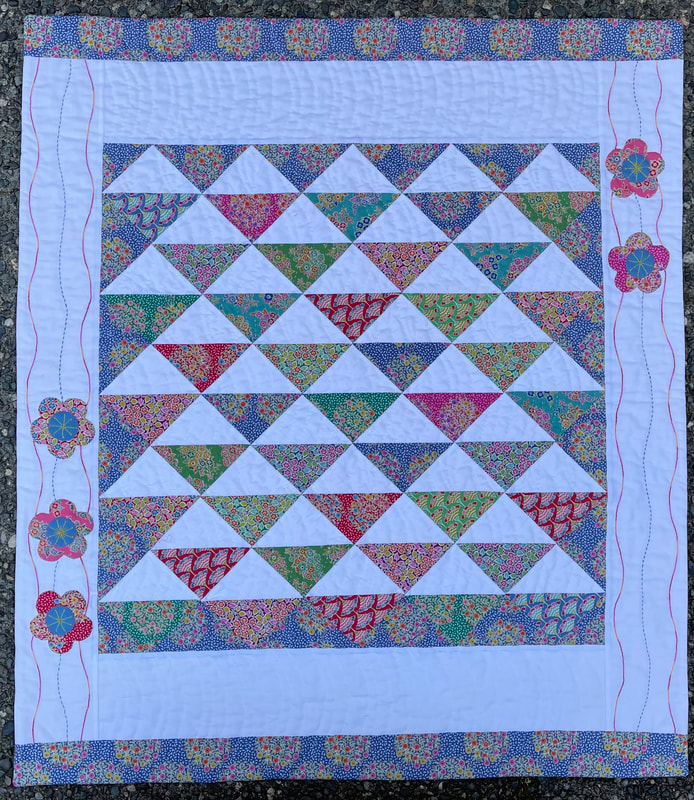 Quilt material requirements call for yardage and fat quarters. It can also be made using a charm pack for the half square triangles. However, you would need to adjust size of setting and corner triangles. You will end up with a smaller quilt.
0 Comments
 Here's how these were made. Photo above is the completed rainbow edition of my bear paw baby quilts. They are finished envelope style so there is no binding. The quilting happens after all edges are finished including the dimensional bear heads and paws. For the body of the quilt, I made four bear paw blocks with center sashing and border surround. Love these colorful wovens. I've wanted to use them for years now. Any fabrics in rainbow colors would be fun! Blue plaid flannel version of this quilt (scroll down for pics), has an additional small border just because I thought it needed it. 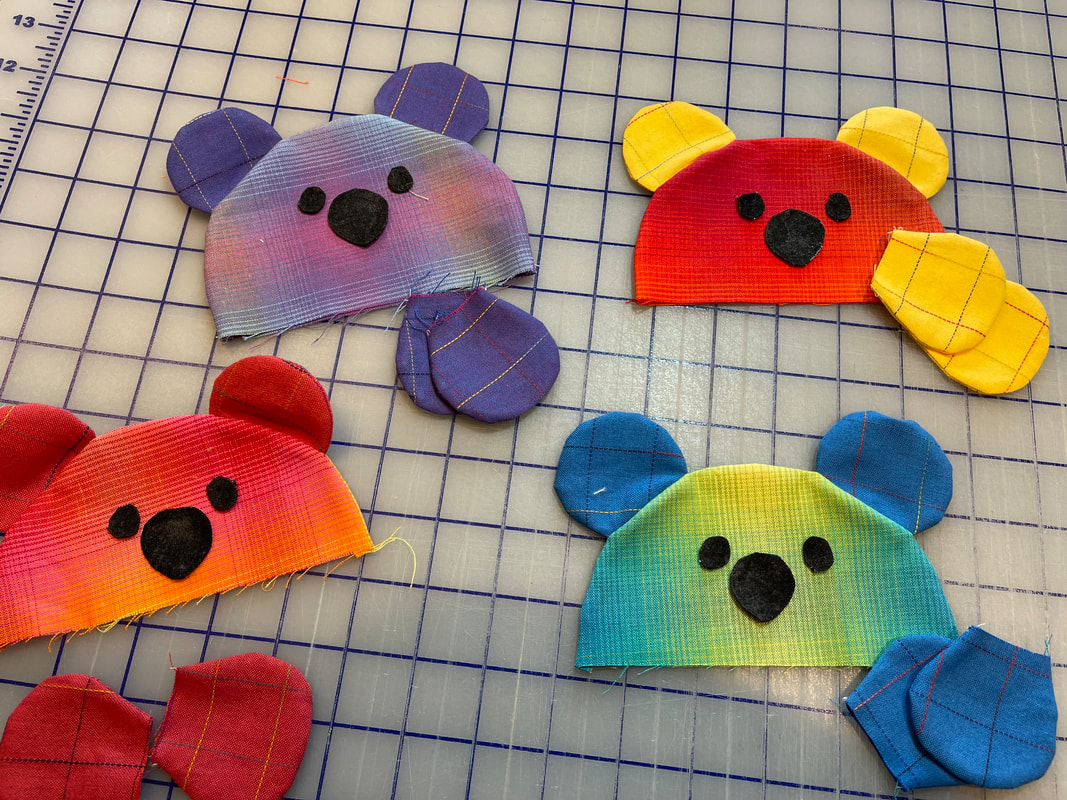 The bear heads and ears are made by sewing two fabric circles (RS) together and cutting a portion off so they can be turned right side out. I drew the paw shape. Cut 4 paw shapes for each bear. Sew around the edges leaving narrow side open. Turn and press. For the heads and ears, make the ears first. Cut and sew around circles. Slice a small piece off of one side. Turn and press. Cut two circles for each bear head just like you do for the ears. Place ears in the seam allowance of the head circles leaving space between the ears :). Sew around entire circle. Cut a small portion off of the circle opposite the ears. Turn right side out and press. Applique the eyes and noses. Cut backing and batting the same size as your top. Now you're ready to assemble and quilt. 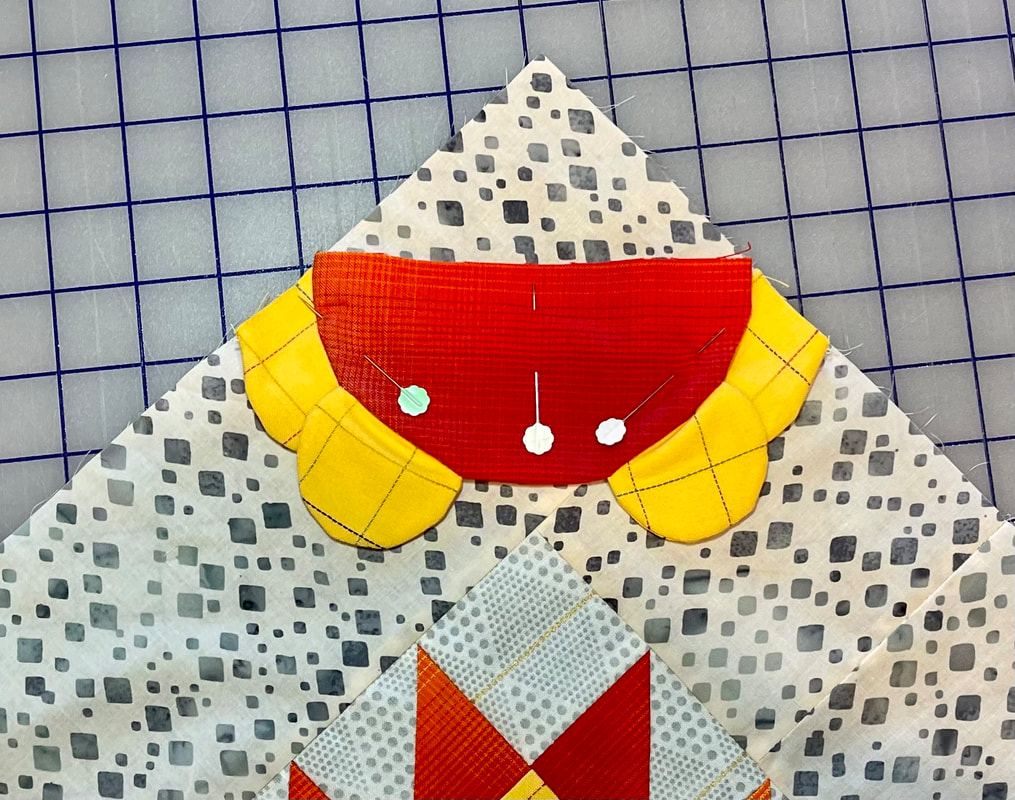 Center bear head approx. 3" from the corner point on quilt top. Bear head edges should reach quilt sides. Make sure you leave at least a seam allowance beyond the nose. Match up raw edges of paws on either side of the head so raw edges end up in seam allowance. At this point, I basted the heads and paws in place. Next step. Don't be scared but trim off the corner of the top (matching raw edges of bear head). Repeat for all 4 corners. Place the quilt top right side up on top of the batting (I spray basted top to batting). Place backing right side down on top of the quilt top. Match up edges and baste around entire quilt to avoid shifting. Leave a fist sized opening for turning. Sew around the edge. I used a 3/8" seam allowance on this step. Blunt corner edges, remove basting and turn right side out. Use a chop stick to push out corners and flatten seams. Press edges and sew around entire quilt closing the opening. 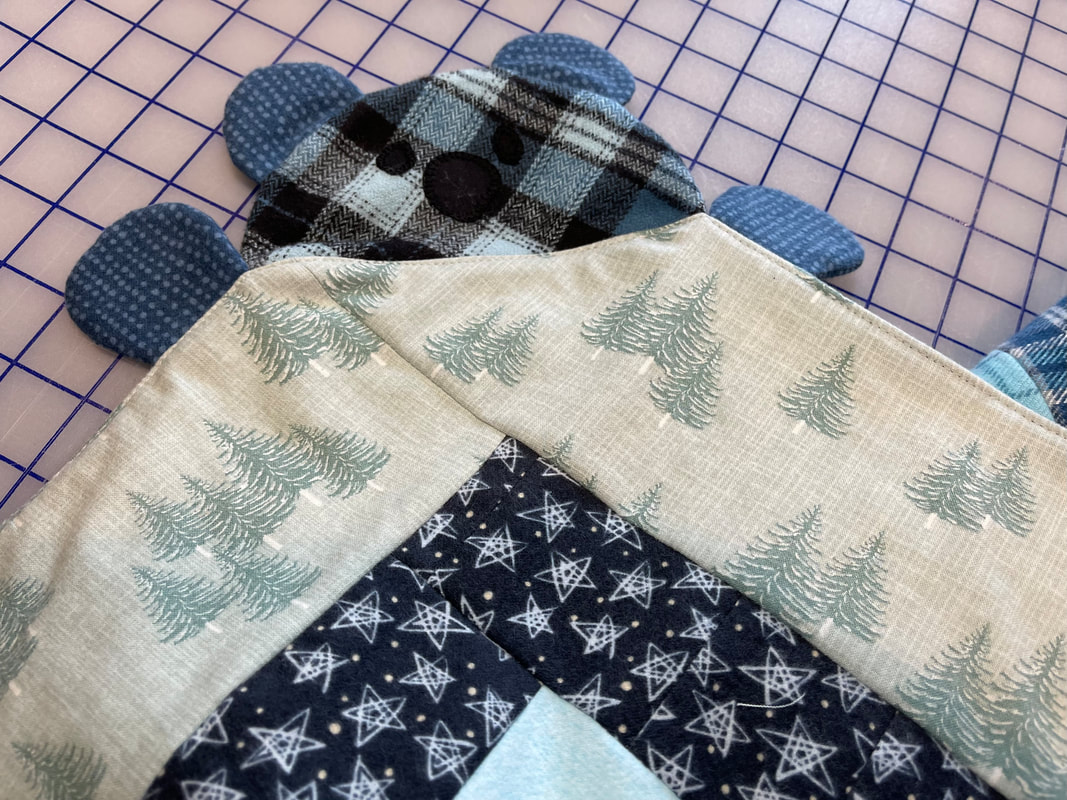 This is how the corners of the quilt look after the quilt sandwich is sewn together and turned. Bear heads and paws are freeeeee. Now you're ready to quilt. Make sure bear heads and paws remain free as you quilt This is small so easy enough to quilt on a home machine or by hand in any way you like. 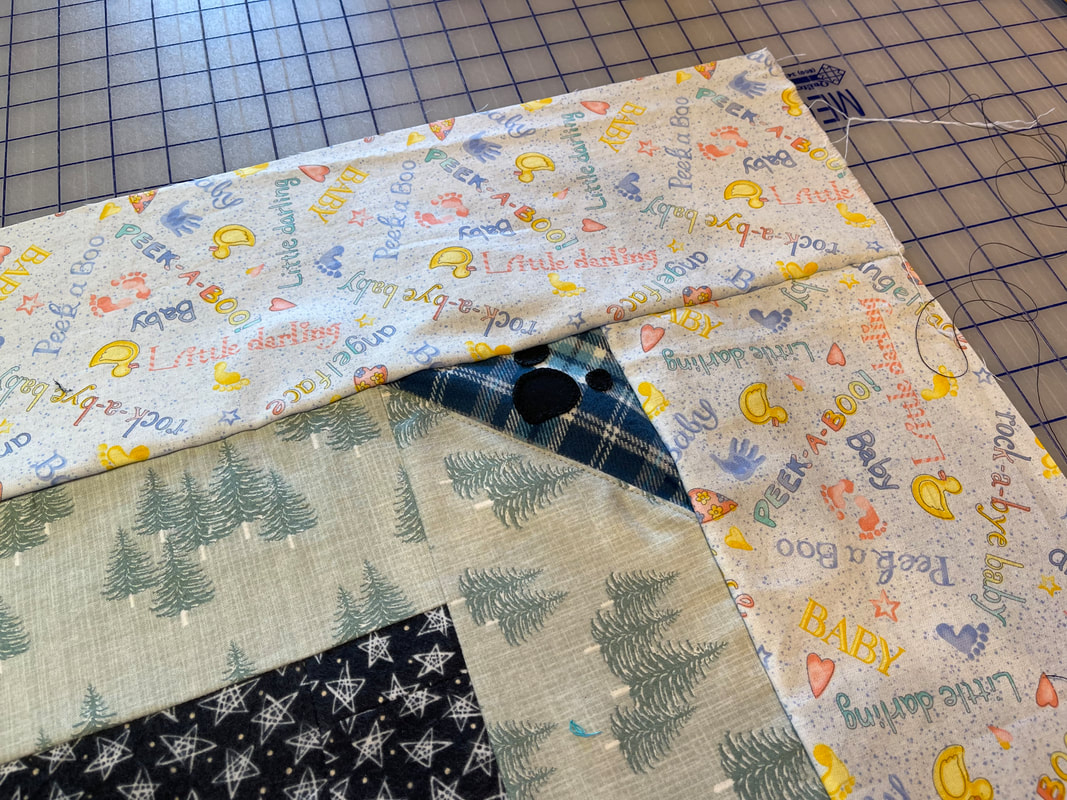 These two were quilted on my longarm. Strips were added to quilt edges for loading. This helped keep the heads and paws free also. 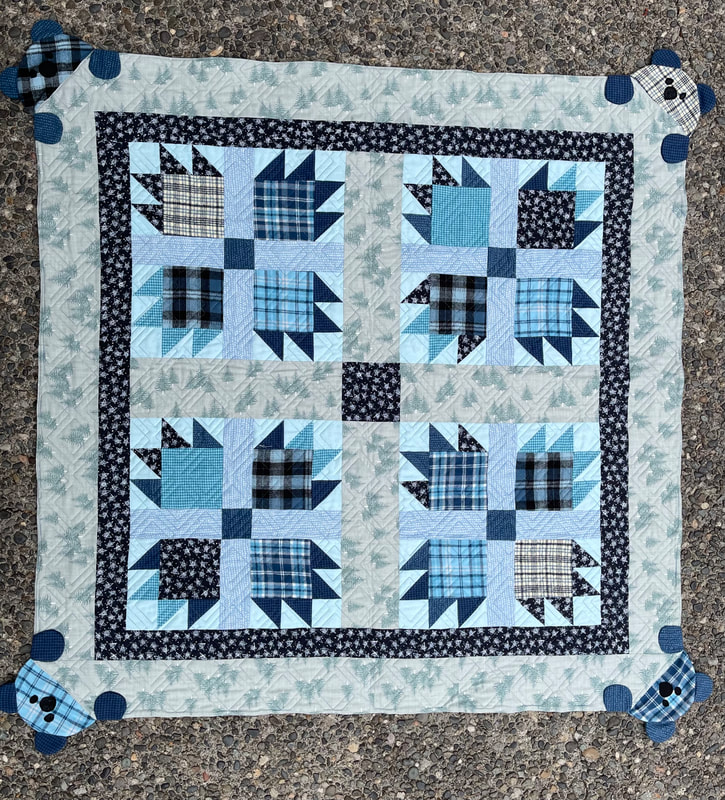 Plaid quilt is slightly larger because a framing strip was added around the bear paw blocks. All flannel fabric including the back is oh so soft. Last step after quilting. Applique paws to quilt sides so it appears bears are peaking over the corners. 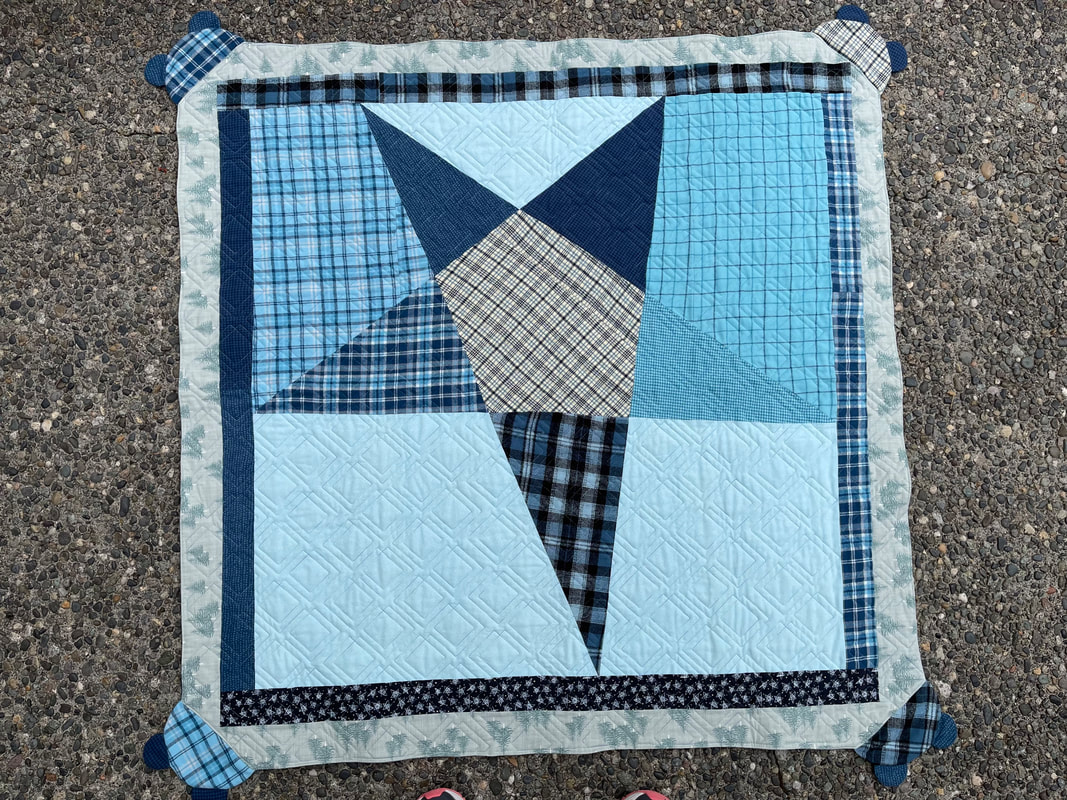 Had some fun piecing the back of this one too. Used up a lot of leftover flannel from the top. The star is from an out of print pattern called Baby Big Star by Linda Johnson. Pantograph is Diagonal Plaid by Urban Elementz.
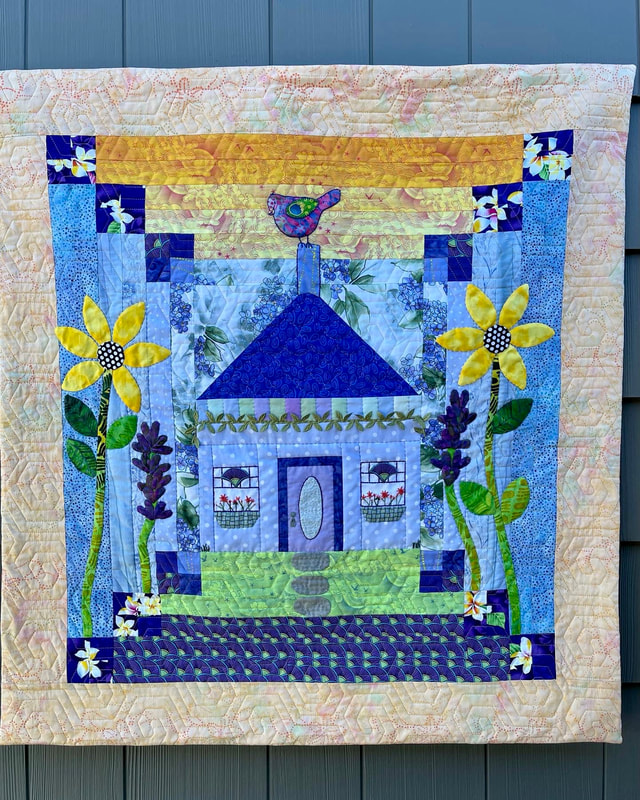 Earlier this Spring, I got the urge to make something summery. Some small cottage/bungalows around Sequim caught my attention when we first moved to this area. I've thought for years they could make a fun wall quilt. Whadda ya know, this turned out to be the year to actually do something about it. The following shows part of the quilt progression. Scroll to the end to see pictures of the houses that inspired this. 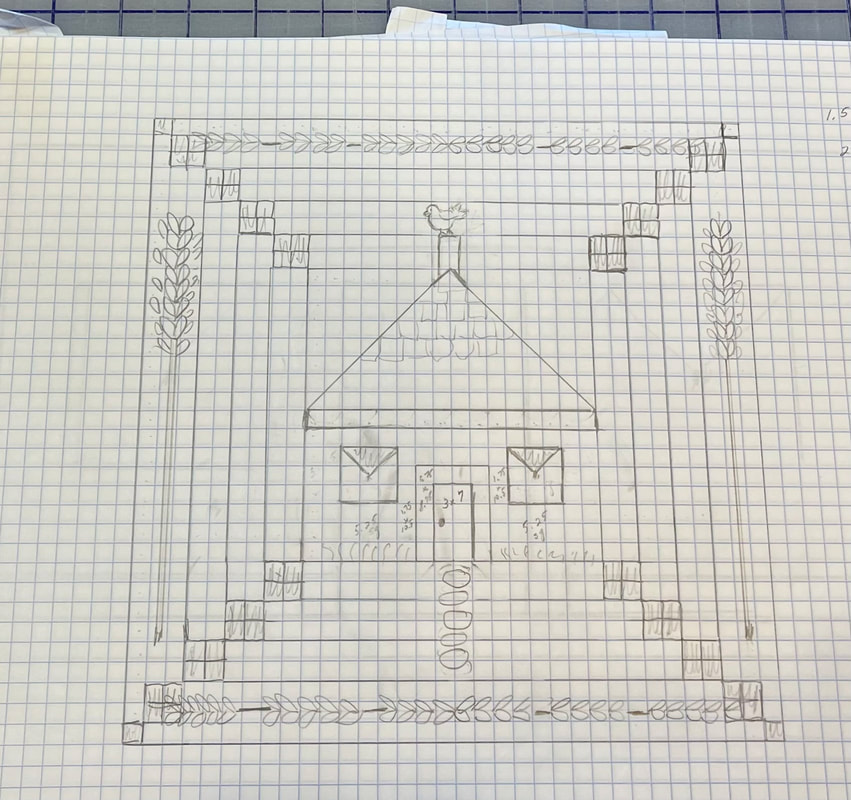 Here's my starting point. Sketched out a Courthouse Square block with house in center and small diamonds pieced into the corners. 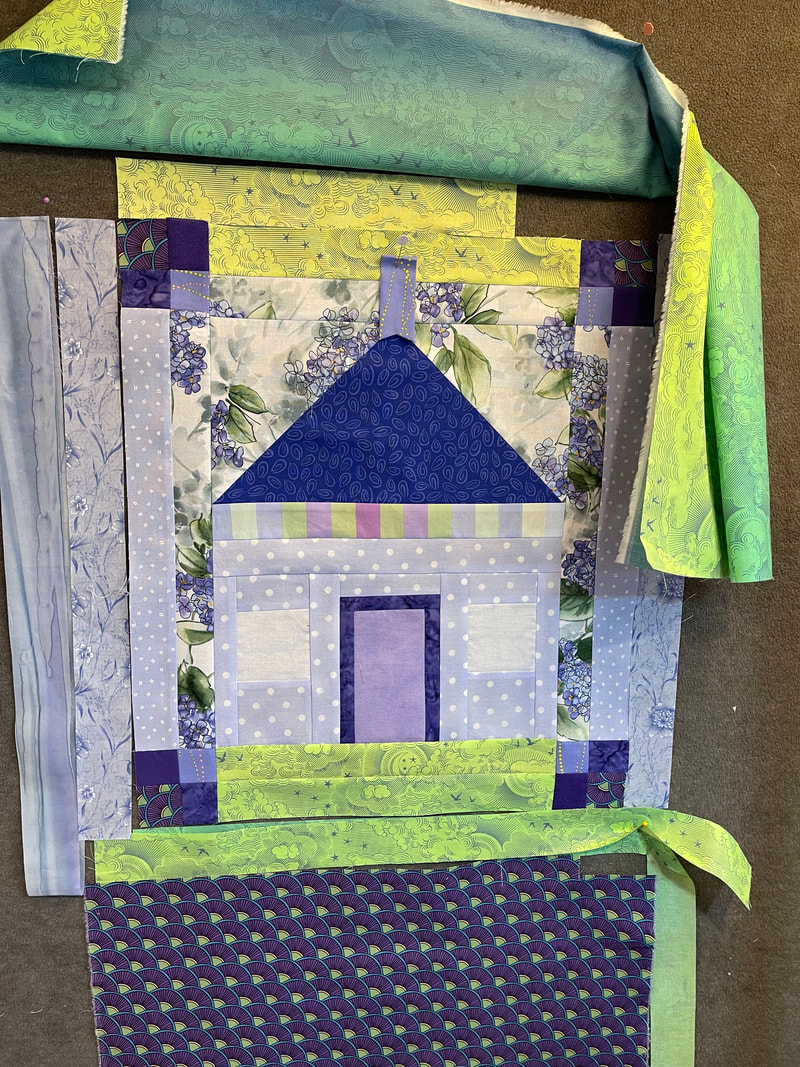 Auditioning different colors for strips surround the house. 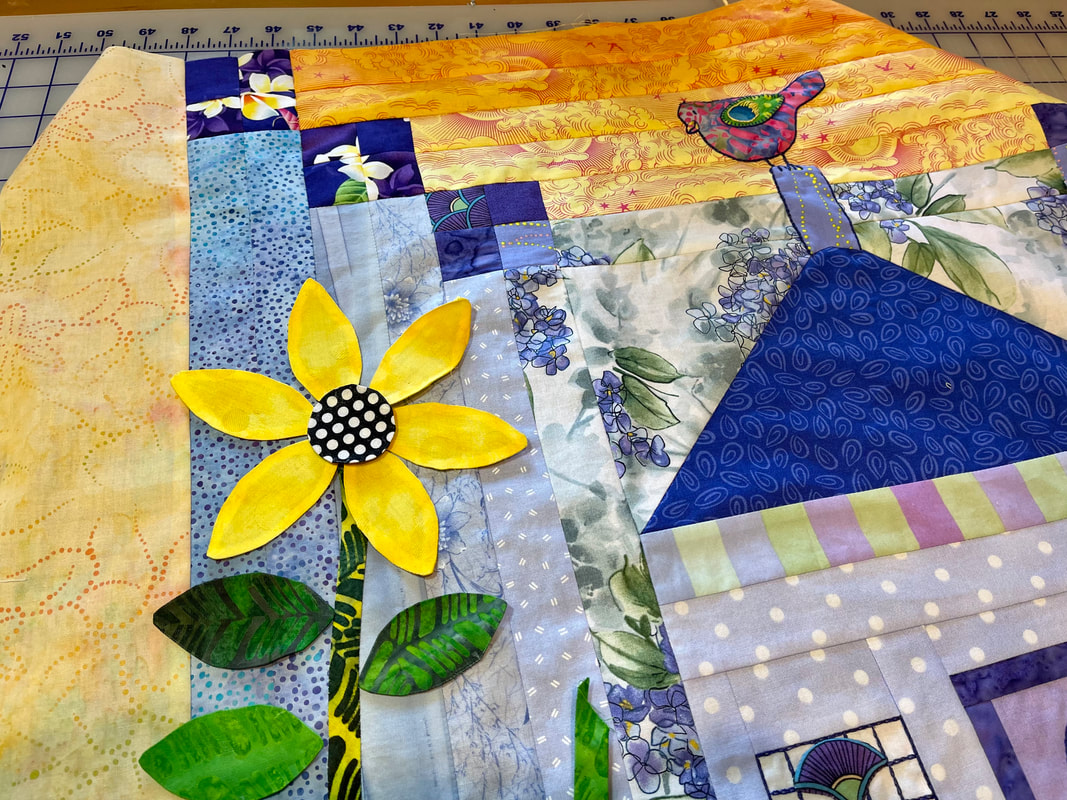 Adding appliques for more color. 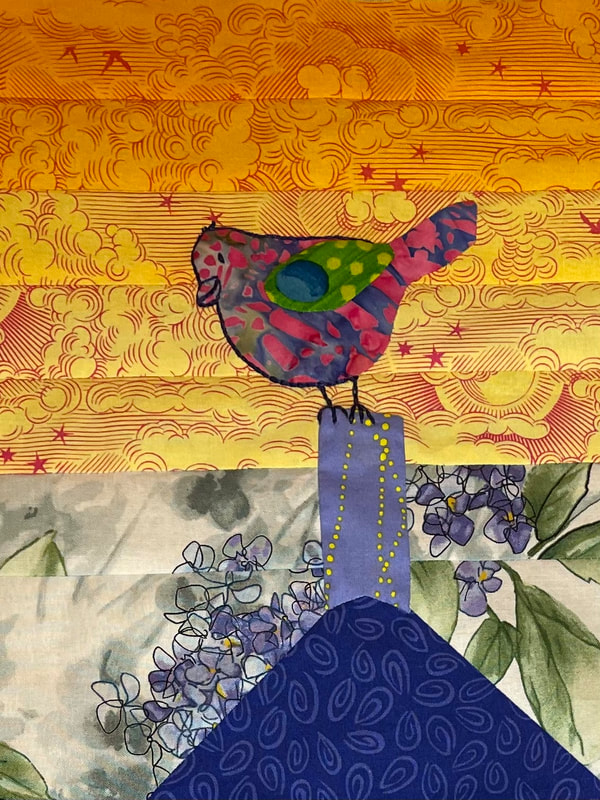 Outlining the bird applique with embroidery stem stitch. 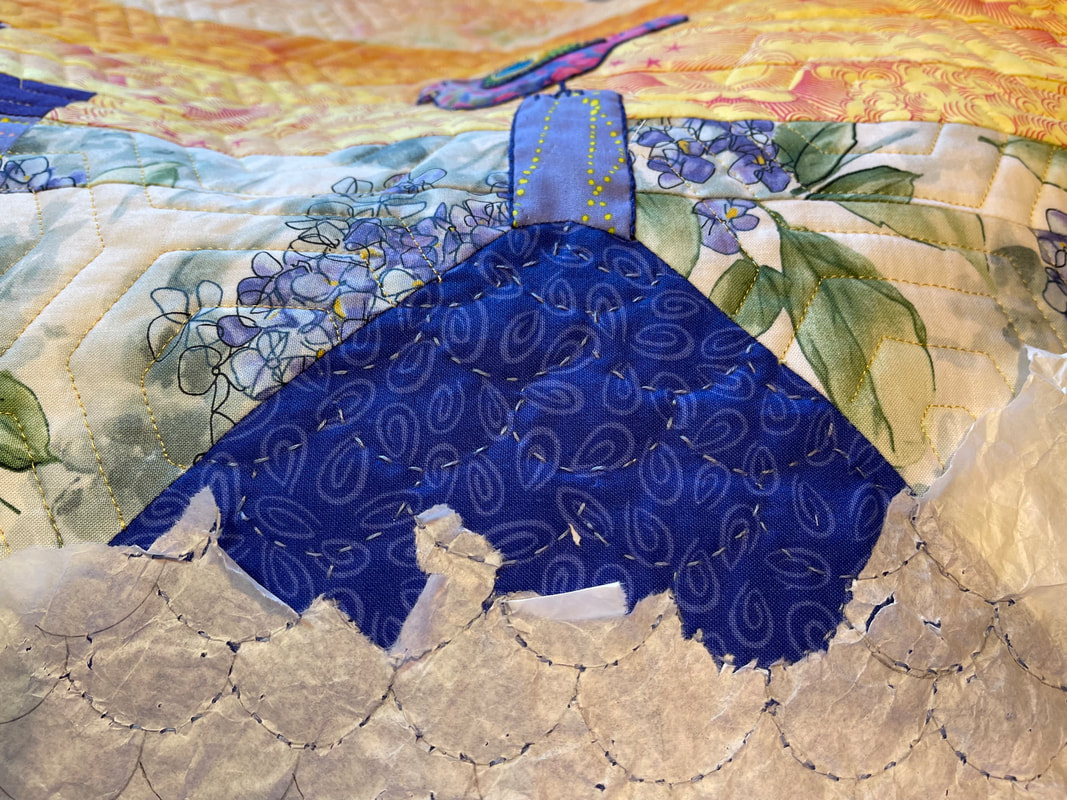 Big stitch quilting texture in the house roof. I used a combination of big stitch and machine quilting. Most of the background around the house is a machine stitched honey comb pattern. 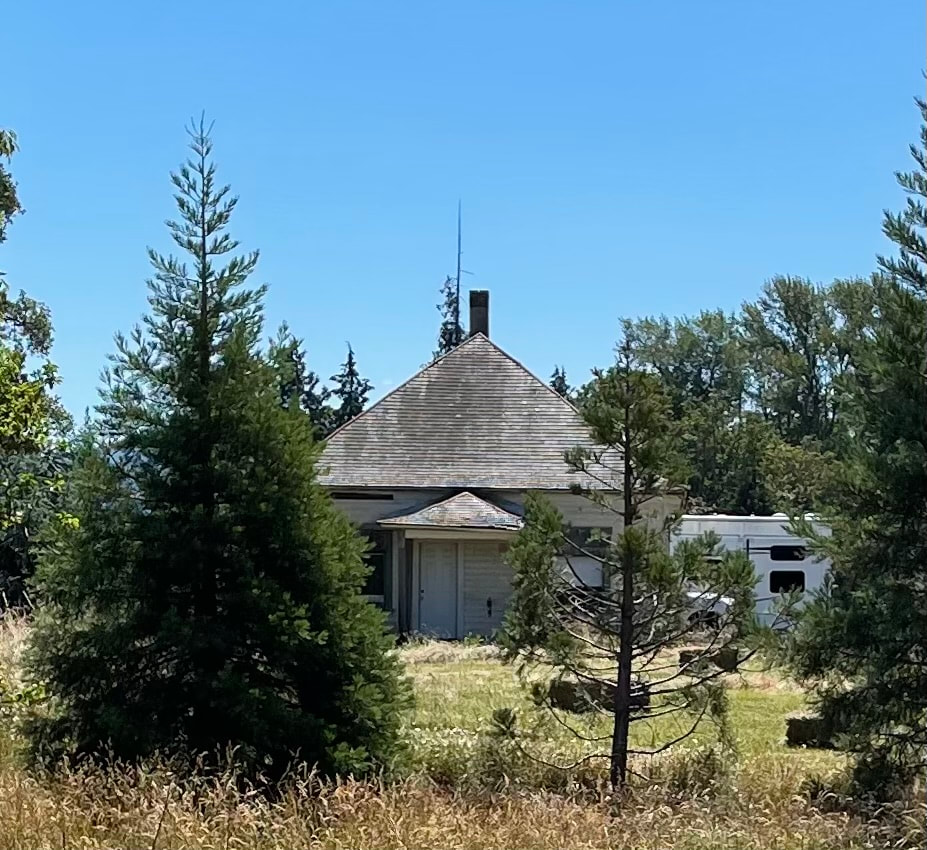 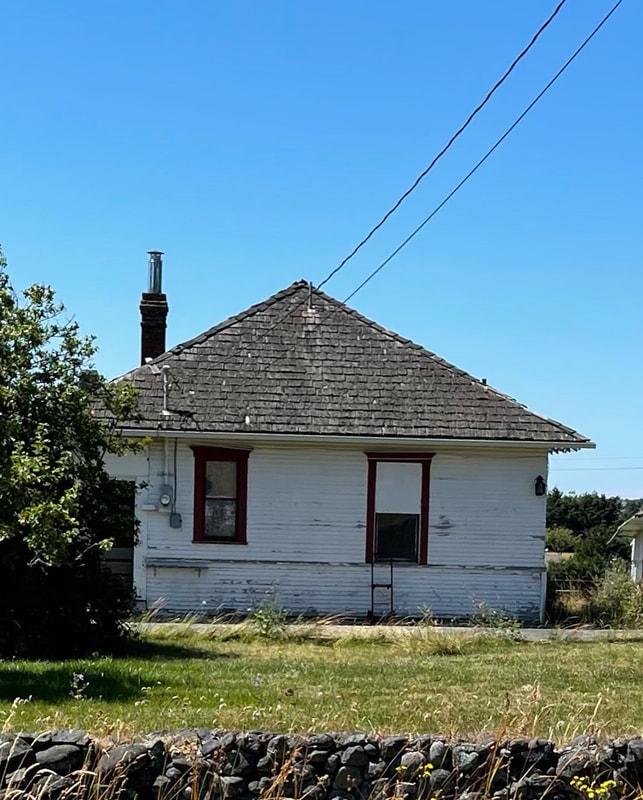 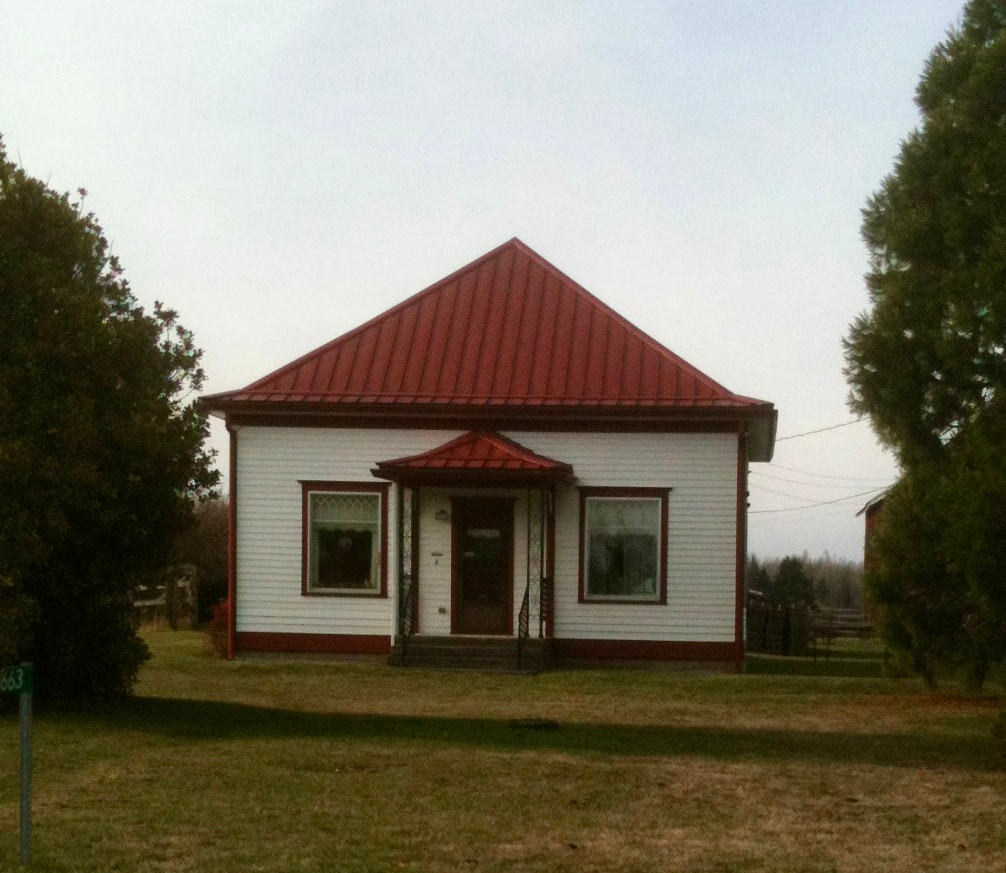 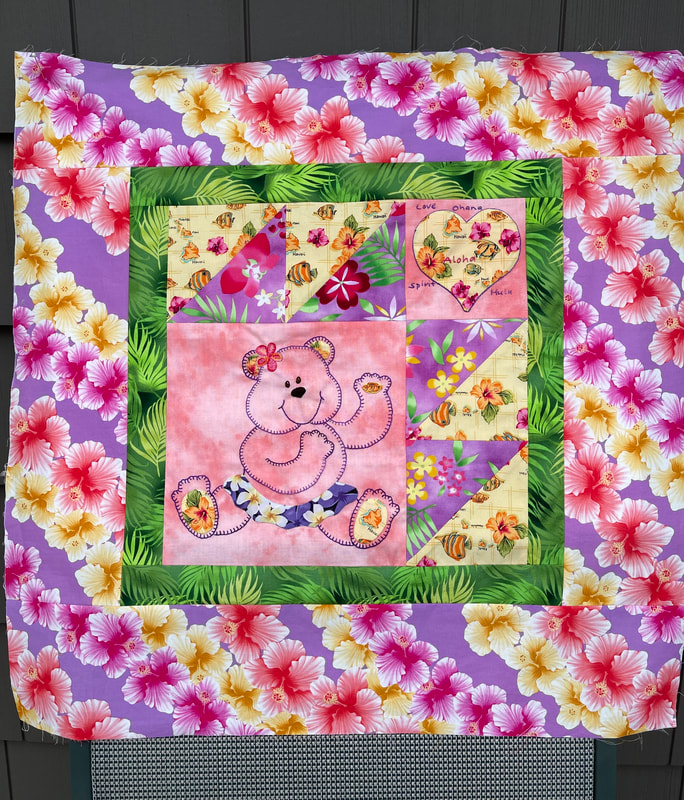 Completed this little top today, Valentines Day 2022. It was fun getting back to some hand stitching (just healing up from a finger injury). The top is approx. 25" x 26". So probably big enough to tuck into a car seat or stroller. The bear block is 9.5" square. It will be quilted using a light batting with flannel backing to finish. I decided to embroider Hula Bear this time and use fewer appliques. She's bright and sweet. The prints are mainly Trendtex fabrics from Hawaii. I like making the appliques using sew in interfacing. The results are a flat applique with edges turned under. I learned this method from a tip in an old Quilter's Newsletter Magazine. I've used it when possible ever sense. Below are pictures of what that process looks like. 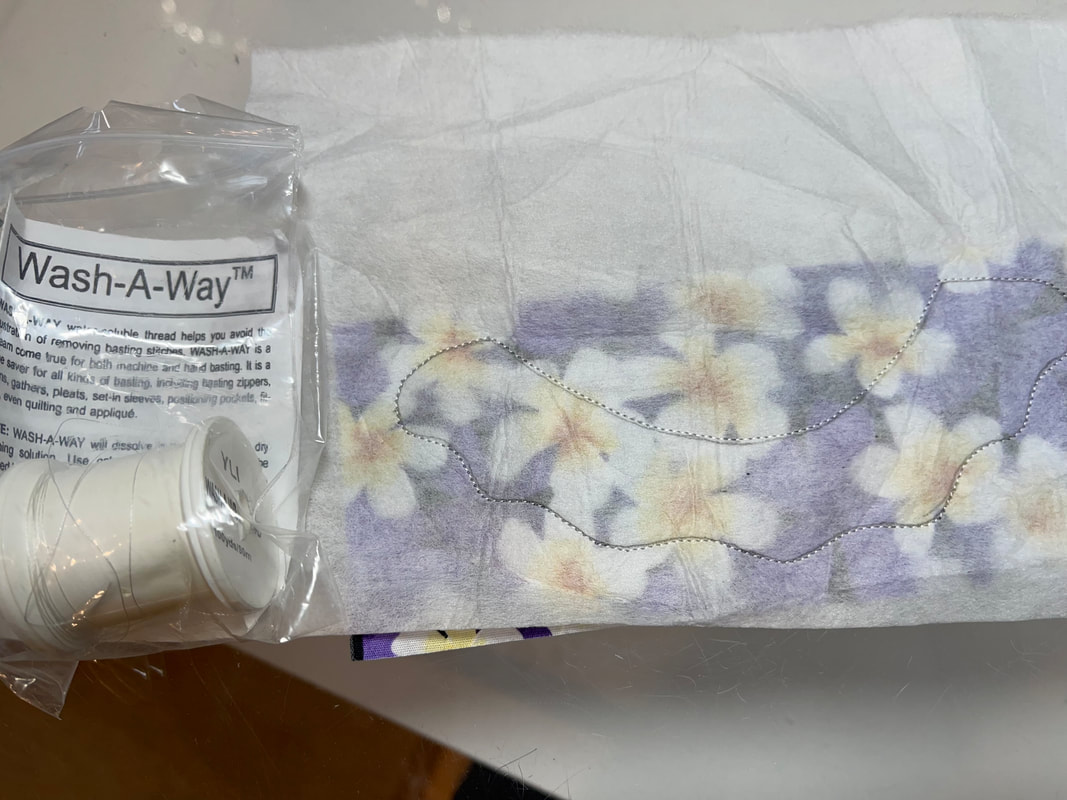 1 - Trace your shape on to light weight, sew in interfacing. Pin to the right side of applique fabric. You can see through it to position your applique. 2 - Thread needle with water soluble thread. 3 - Shorten stitch length to 1.5 or 1.6. 4 - Sew around your shape just outside the drawn line. 5 - Trim leaving a 1/8th to 1/4" seam allowance outside the line. 6 - Clip any curves if needed. 7 - Cut a slit in the interfacing only and turn the shape right side out. Use the straw and chopstick method to make this step easy. 8 - Use the chopstick or a bodkin to smooth the seams and press shape. 9 - Spray the back of the applique lightly with fabric sizing. 10 - Following instructions on the can, make sure sizing is absorbed in fabric. 11 - Turn the applique right side up and press moving iron back and forth until shape is dry. 12 - Lift interfacing away from the fabric and you have a nice flat applique shape with turned under edges. The interfacing lifts off because the water soluble thread melts away. Magical... 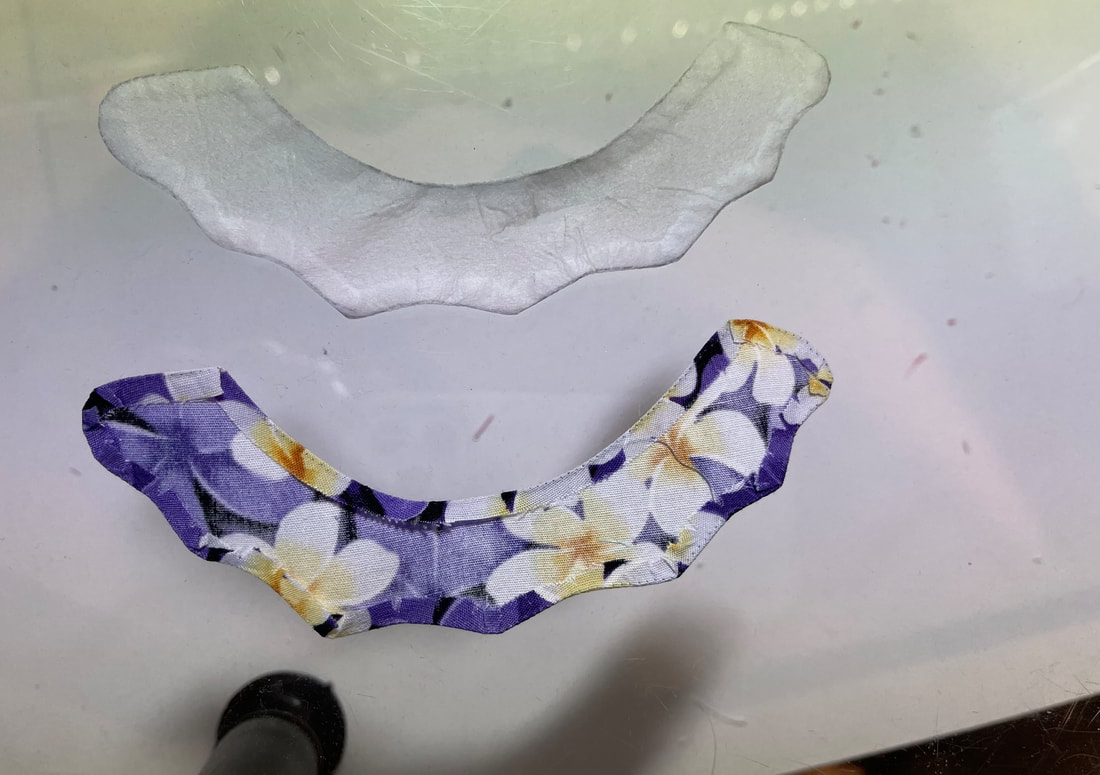 Above is the back of Hula Bear's skirt applique and the interfacing that came away when it was pressed. Nice smooth turned under edges. 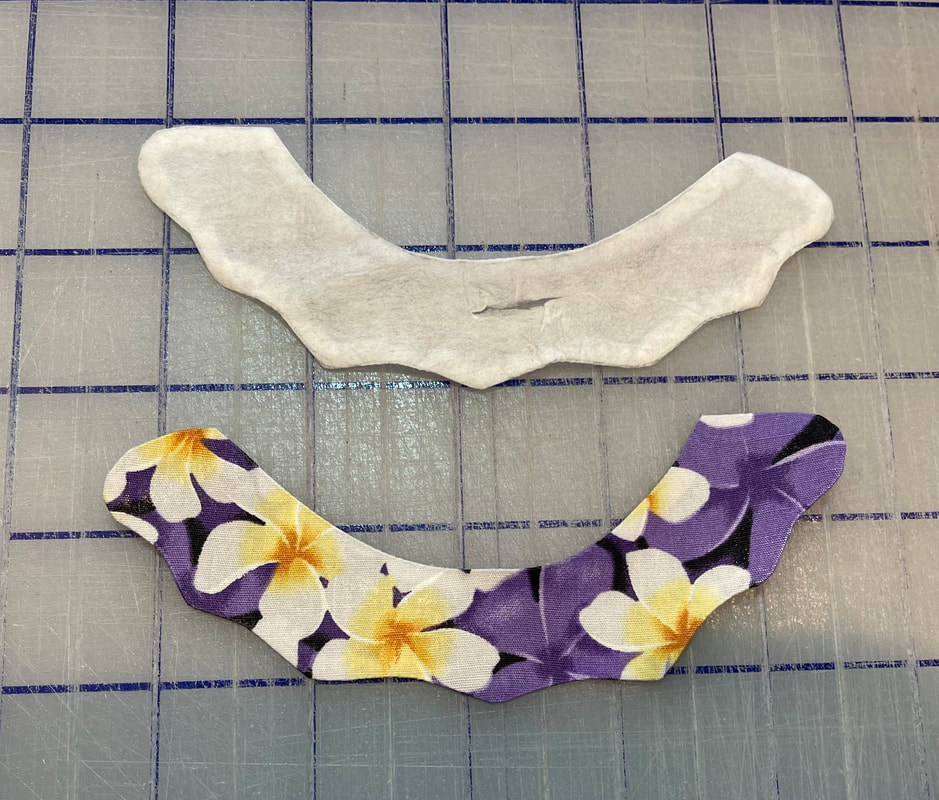  Above is Hula Bear in progress. For me, not always, but a lot of times, applique prep this way is faster than using the starch and paper method or other. You still get a nice flat applique. Also, if you want more body to your applique, use regular thread in the needle and leave the interfacing in.
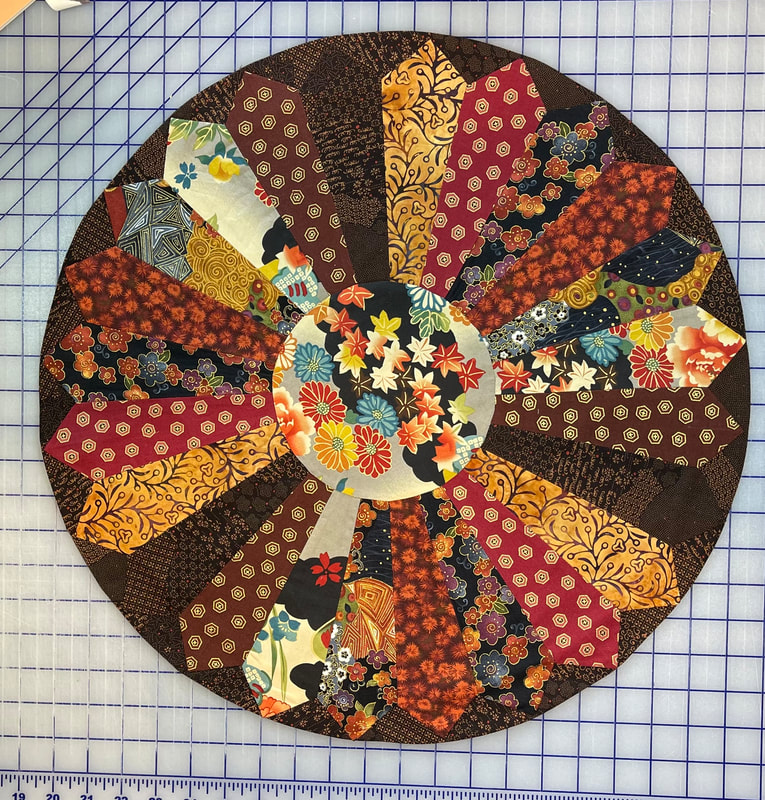
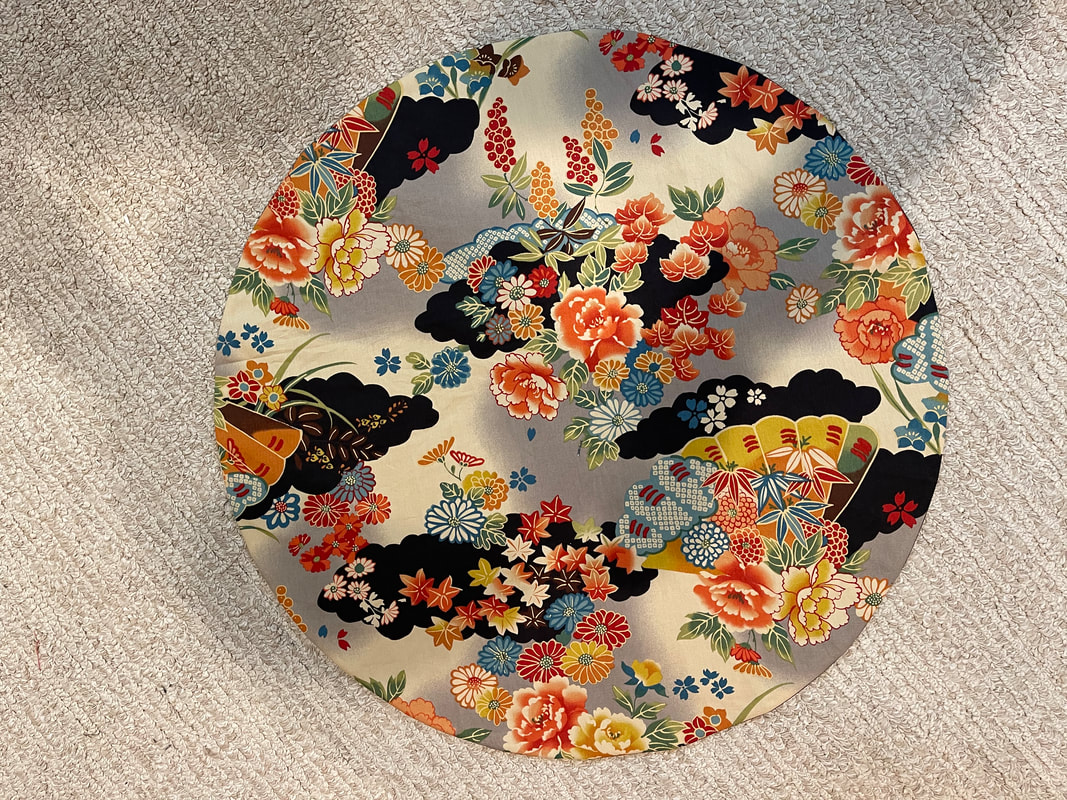
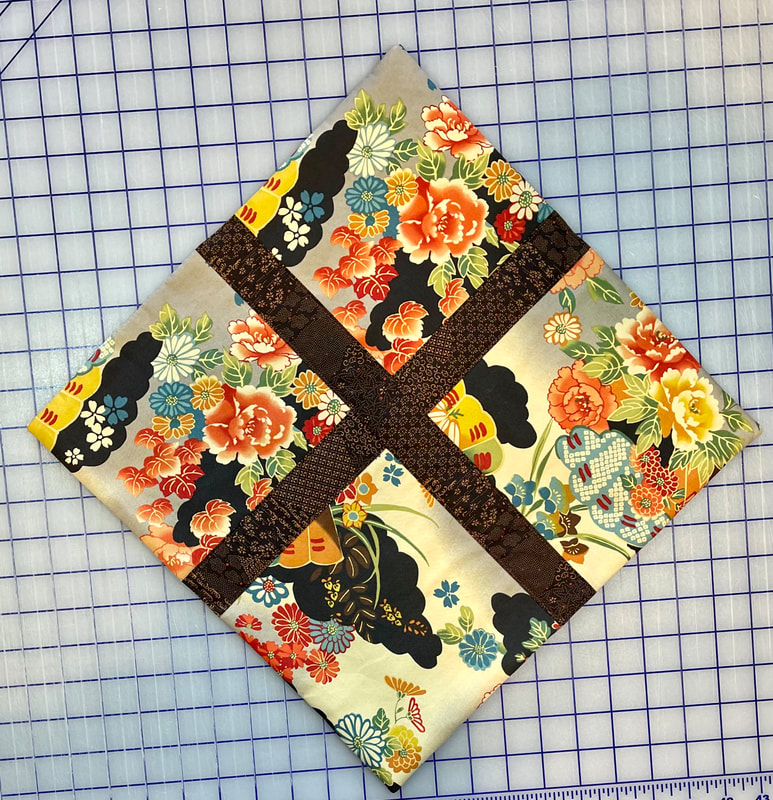
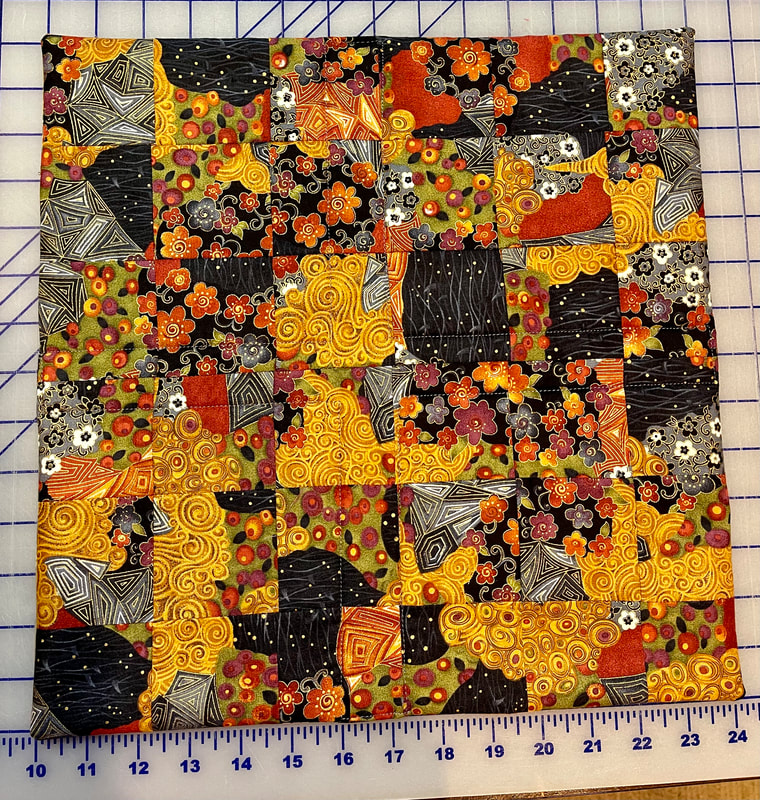
This is my fabric pull for making some new fall table toppers. I wanted to make something using a fan pattern and or Dresden plate and ended up making two. The colors turned out to be rich and saturated. Just right for fall. 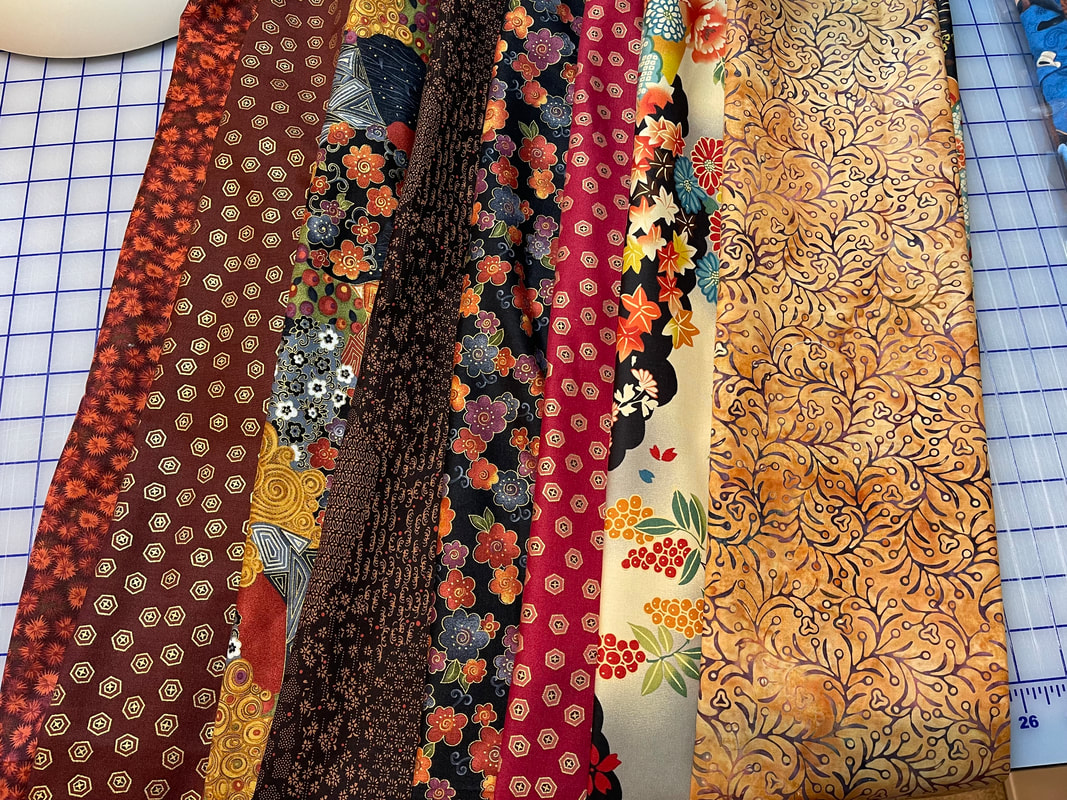 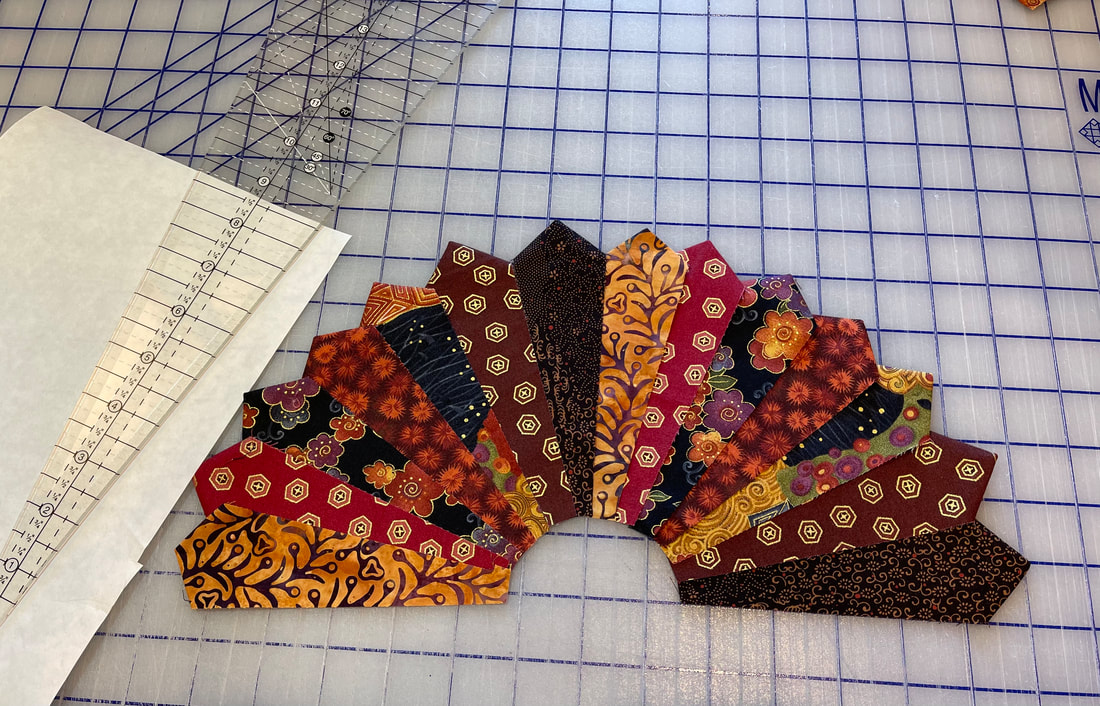 First fan or (half Dresden plate) made with a 15 degree ruler. The ruler is huge (Creative Grids non slip, 24") so you can cut just about any size fan blade that you want. I liked the look of more narrow fan blades so there are 14 in these. Now what? 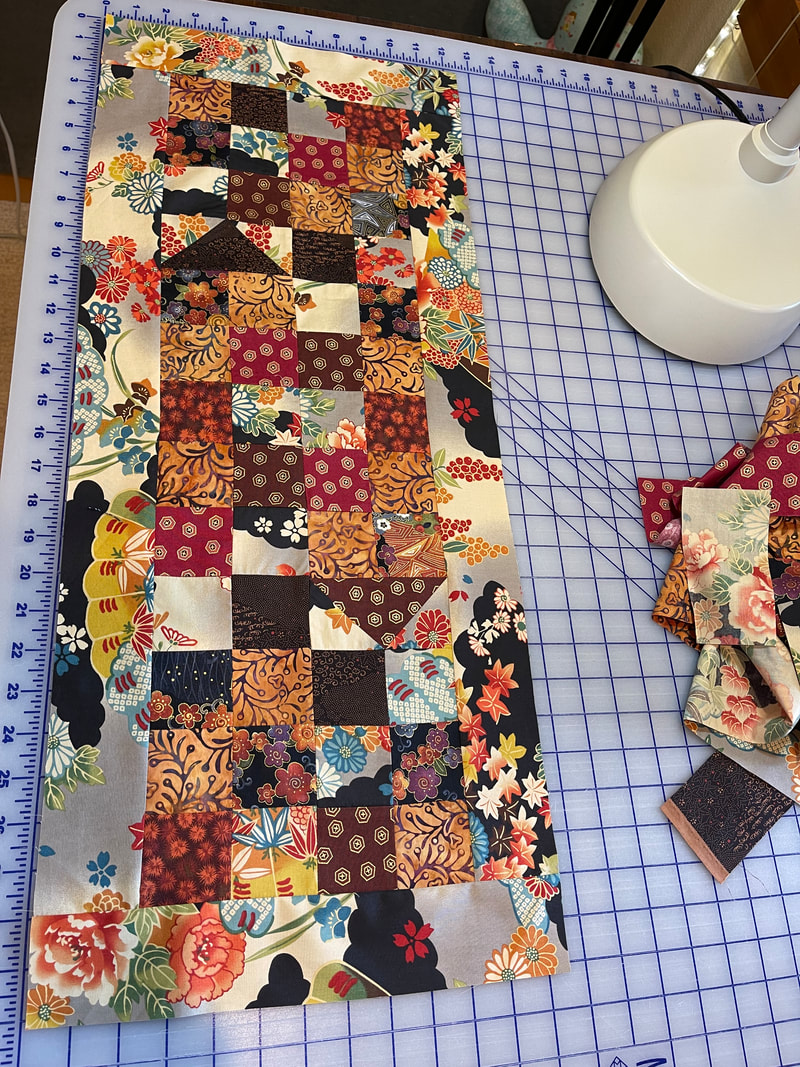 How about sewing a bunch of 2.5" squares together along with 2.5" border strips? Simple and looking good in these fabrics so far. It could be finished just like this. However, we're incorporating the Dresden plate pattern here. So the half Dresden's were appliqued to a rectangle and sewn to each end for the finish. A pretty top for a fall table and or Thanksgiving. To me these particular half Dresden's suggest turkey feathers. :) I liked these fabrics so much I decided to make a full Dresden plate to use as a table center piece. 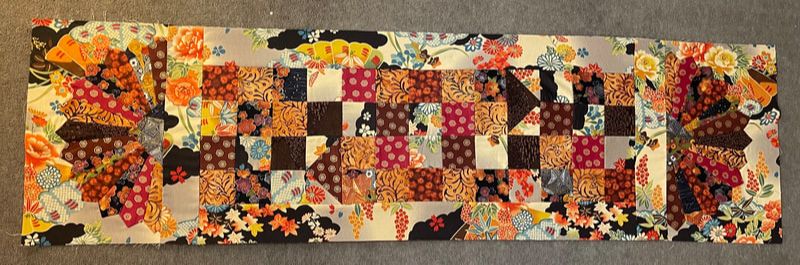
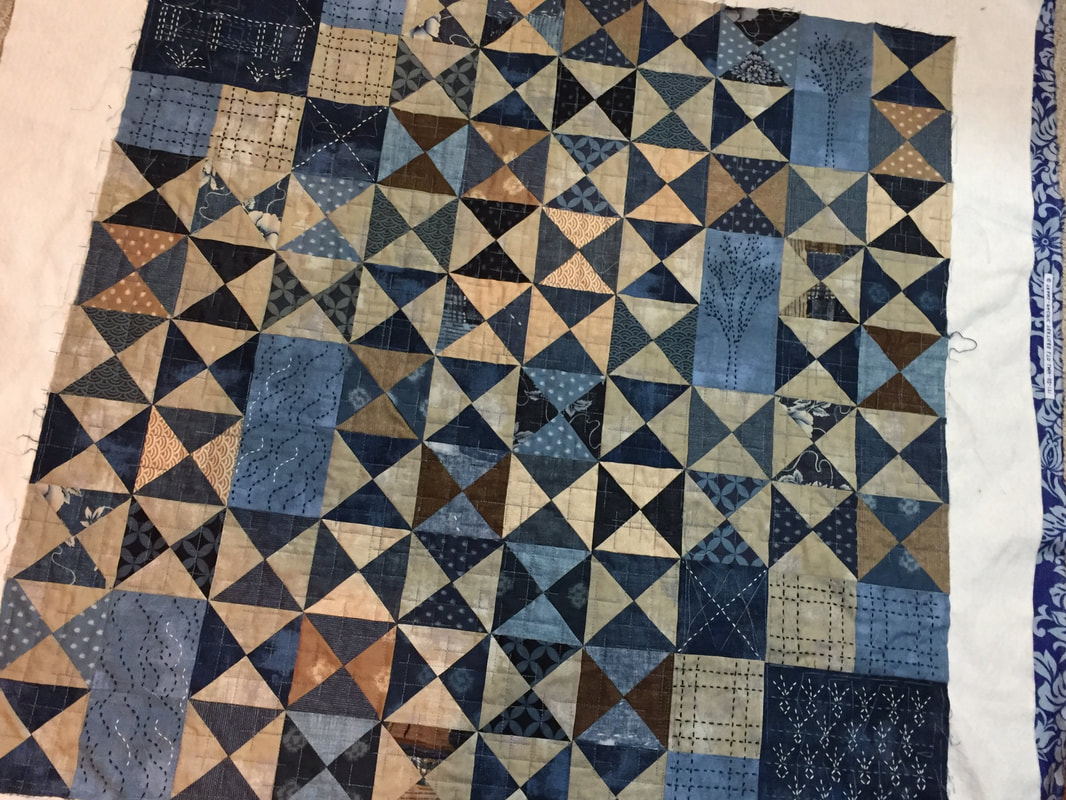
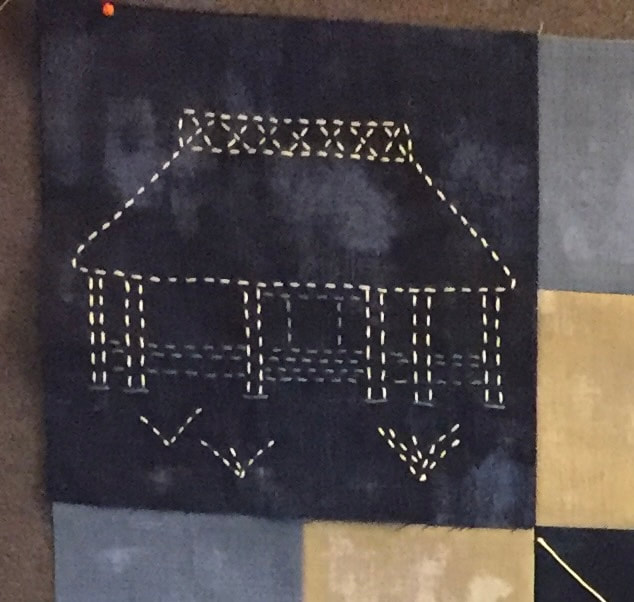
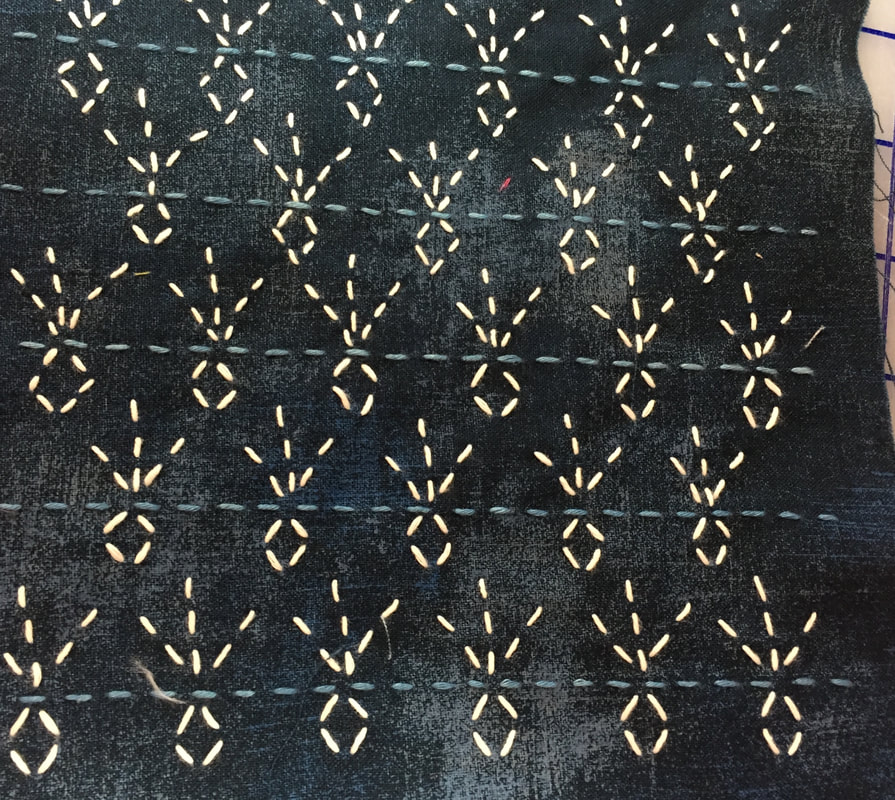
All I can say about 2020 is I feel so lucky to be healthy and wish the same for all! I quilted and sewed a lot in the earlier months of this year. My Indigo Farm started with a Moda Indigo Charm Pack. I used the charm pack and some scrap grunge to make hourglass blocks. They represent fields at the farm. Some dark navy Gunge and a denim/chambray blue provided background for Sashiko blocks. It was an enjoyable time slow stitching the farmhouse, trees and stream, and the daikon radish patch. A fun make overall. It got quilted and finished Jan/Feb. During that time I was also trying to learn a new drawing program. The hardest part of pattern making for me is drawing diagrams and applique shapes on the computer or tablet. While I decided not to create a pattern for this design, I did manage to get some very simple drawings done of the stream, gate and radish patch. Line drawings are here for you to download if you'd like to try some Sashiko.
   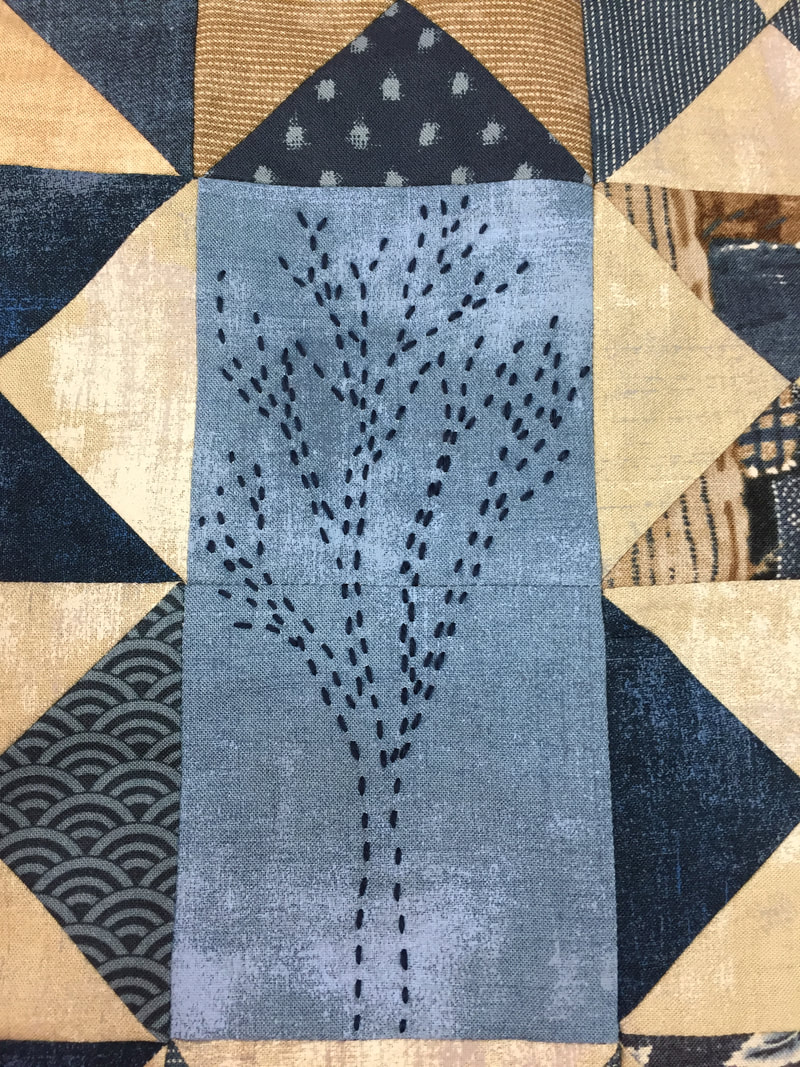 I used a photo of a young Japanese maple along side our driveway to create this tree.
This was maybe the most fun project I completed in 2019. I decided to participate in the #modastringalong (instagram hashtag). I wanted my string quilt to be an applique quilt instead of using pieced blocks. There are lots of Hawaiian fabrics in the closet still after this :). Really not much of a stash buster, even though the whale tails are quite large (36"). It started out with string hearts. Then it was on to turtles, ferns, flowers, whale tails, and appliqued waves under the whales. The ferns were a little tedious to make because of the narrow leaves. It was surprising though despite all the seams, the appliques weren't that heavy. And finally, I cut up the hearts and made a school of fish. The hearts didn't really work with the other elements. The borders are also string pieced. Background fabric is Grunge Clear Water by BasicGrey for Moda Fabrics. Lots of space is left open for quilting. Pantograph is Hula Hibiscus by Lisa Calle. It reminds me of Hawaiiana and this felt like the perfect quilt for it. Better pictures are needed of the finished quilt. Another day... 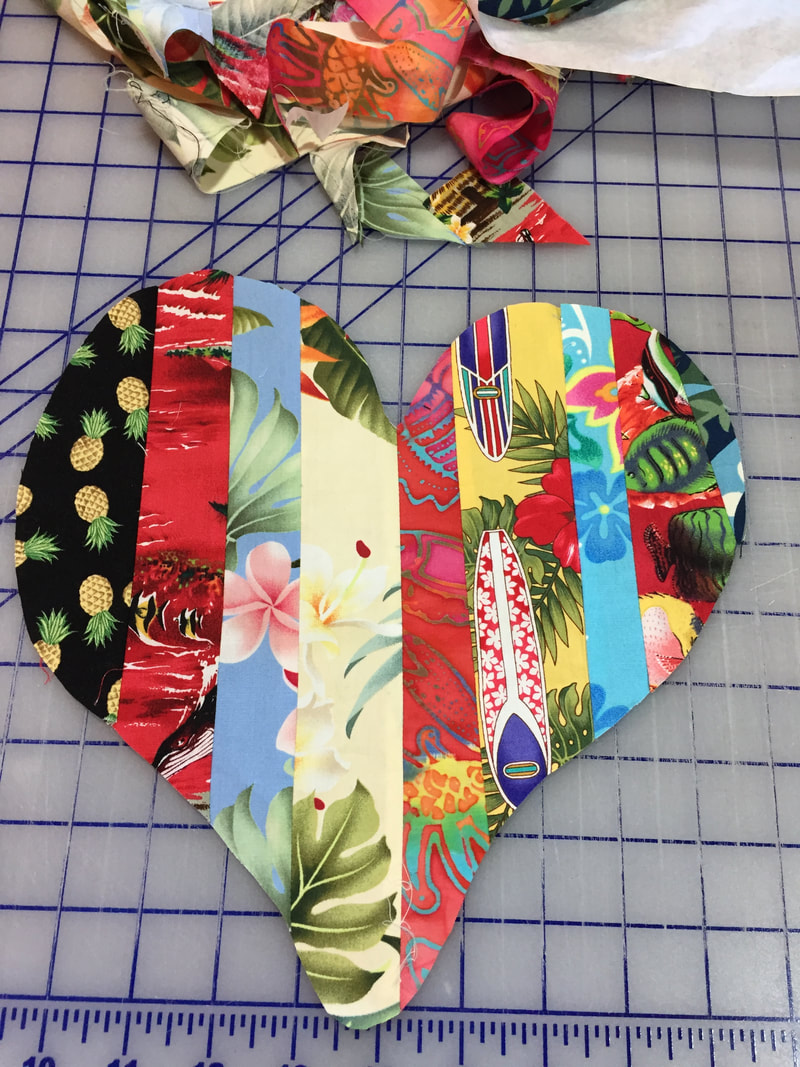  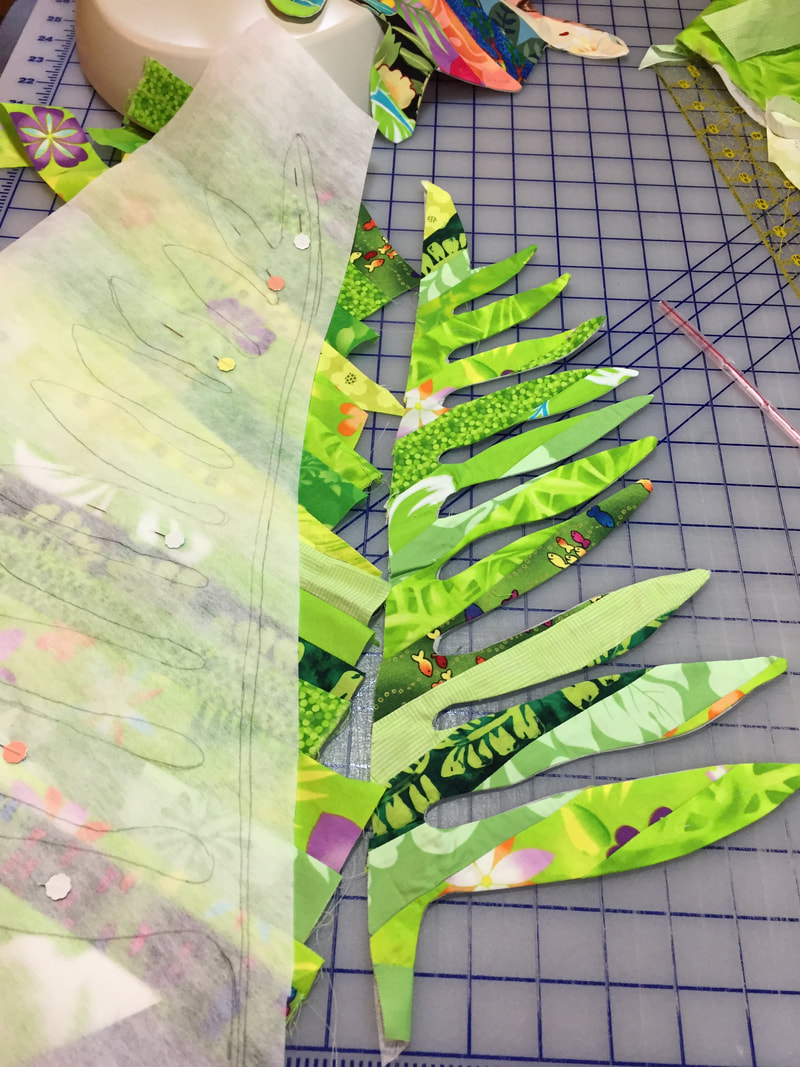 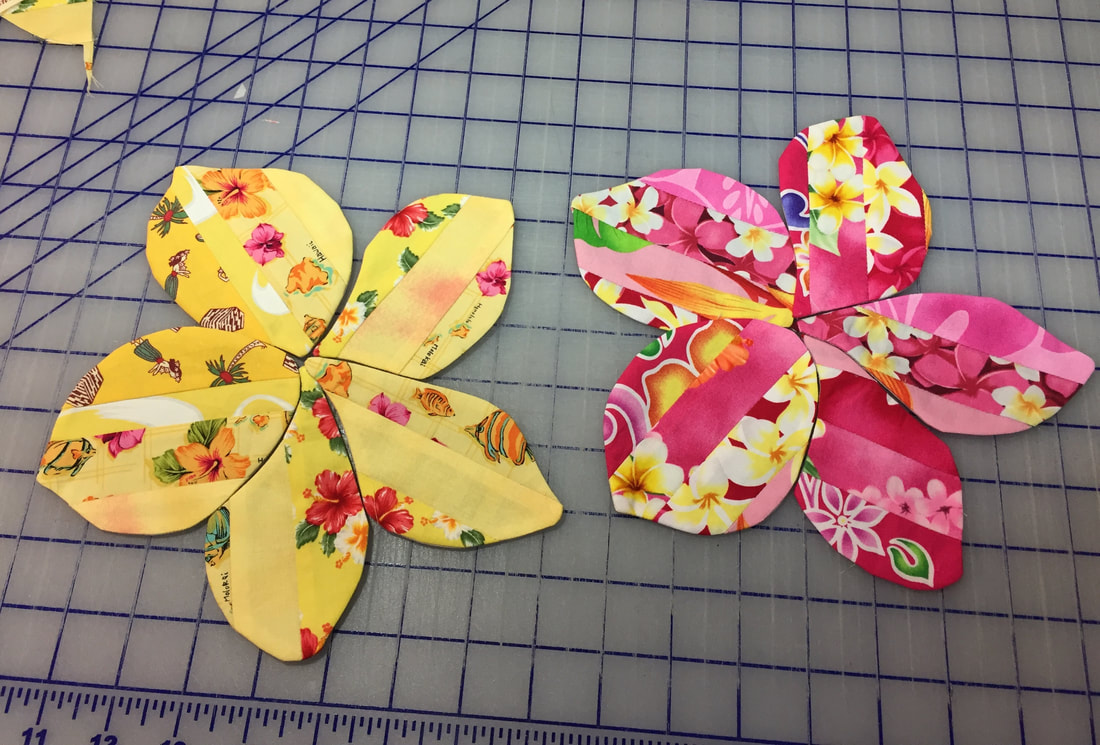  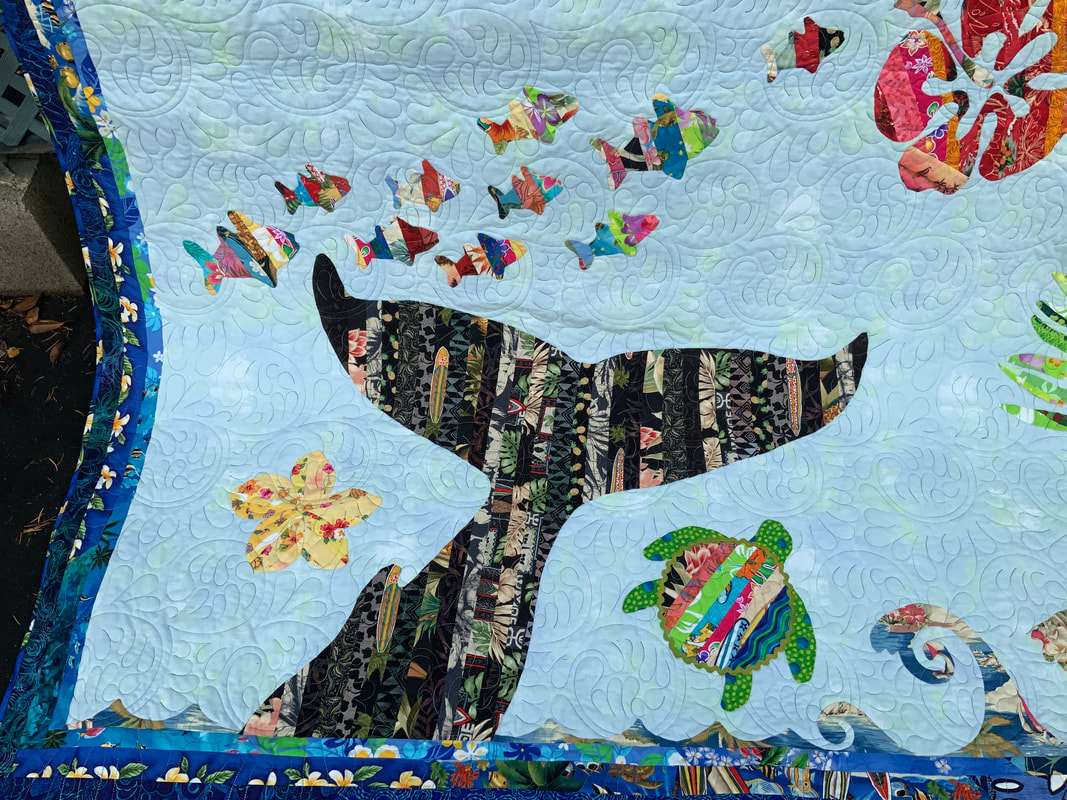 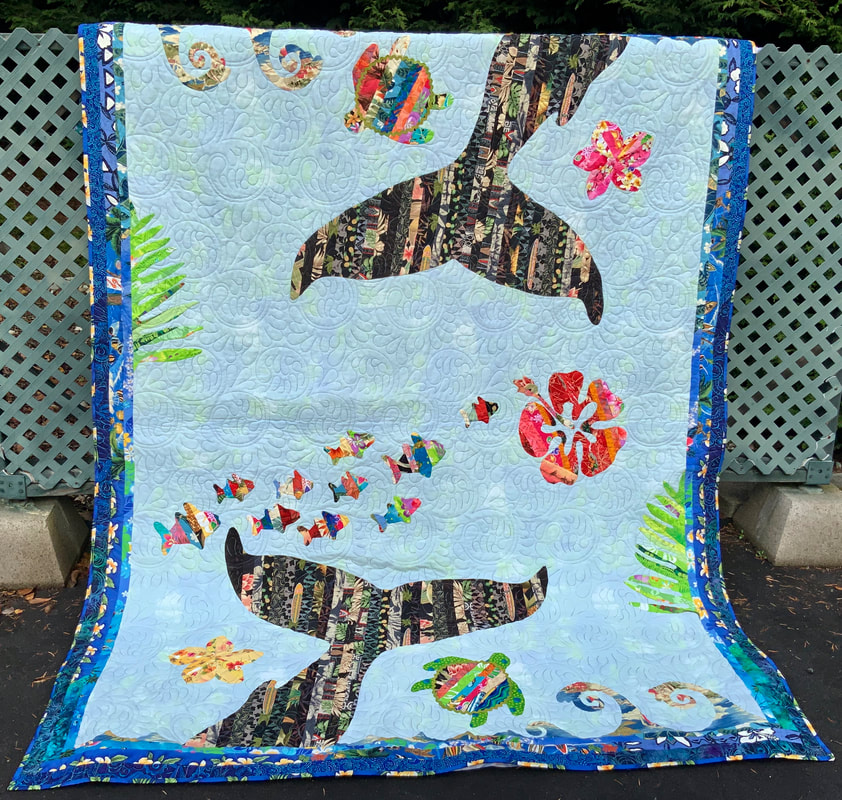 The idea starting out was to use up some fabric from the stash in the closet (Salt Air, Cosmo Cricket by Moda Fabrics). I used Grunge Creme for the background. Big thanks to Oda May, Camp Counselors and other campers for great patterns and inspiration! This was my first quilt along and first medallion quilt. Choose your own adventure summer camp theme. I did choose to go off on my own a bit adding some shell, star fish and whale tail appliques. Mainly because the Salt Air fabric line has a sea theme. Here are pictures of how my quilt progressed over the summer and fall (apologies for some of the pics clarity). The top is complete and backing purchased. Now to figure out the quilting part. I'm so happy with how the top came out. You can see other campers quilts on Instagram #chooseyourownadventureqal #campodamay 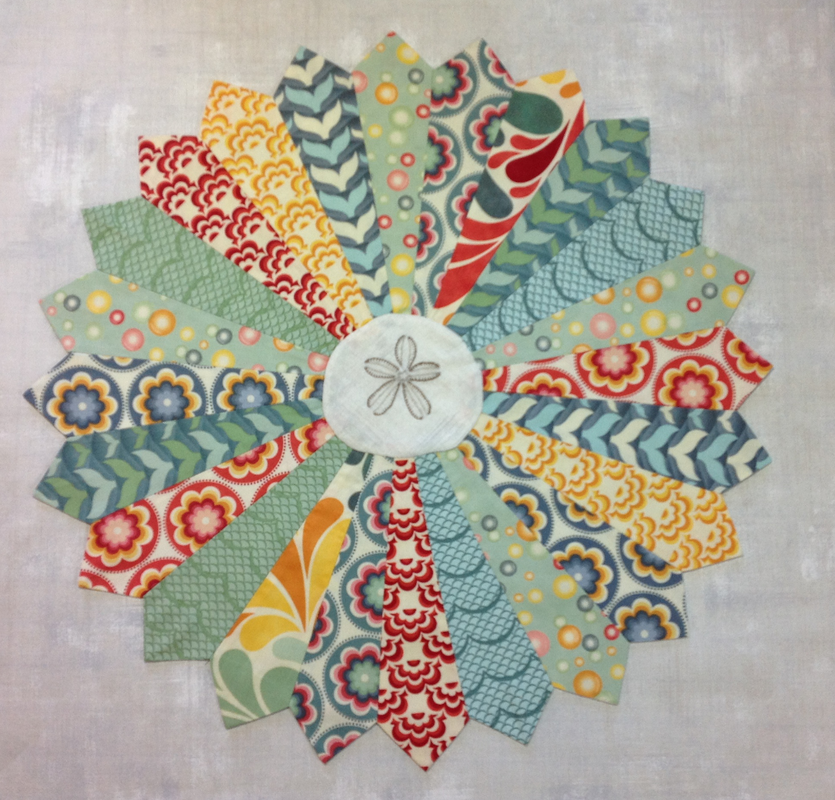 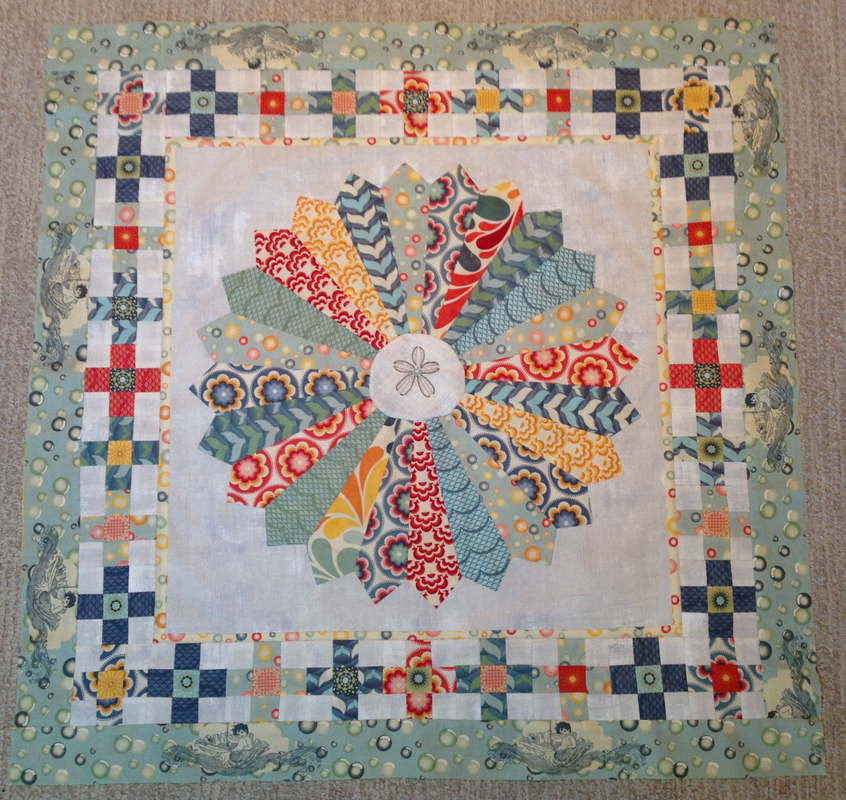  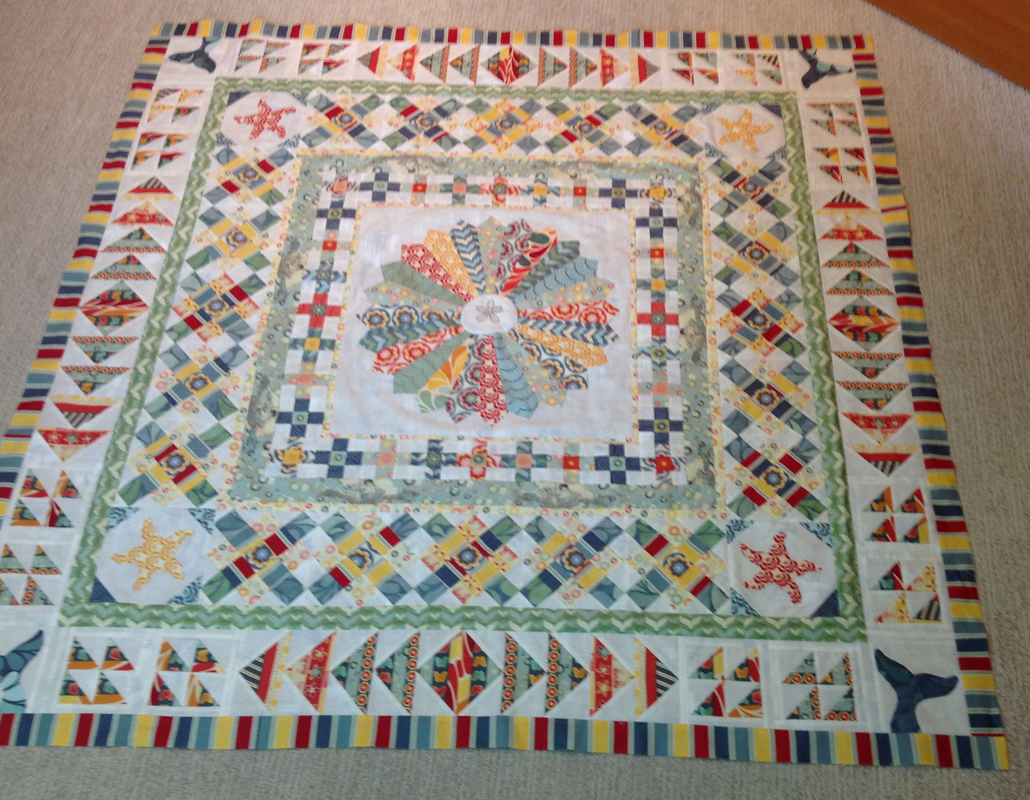 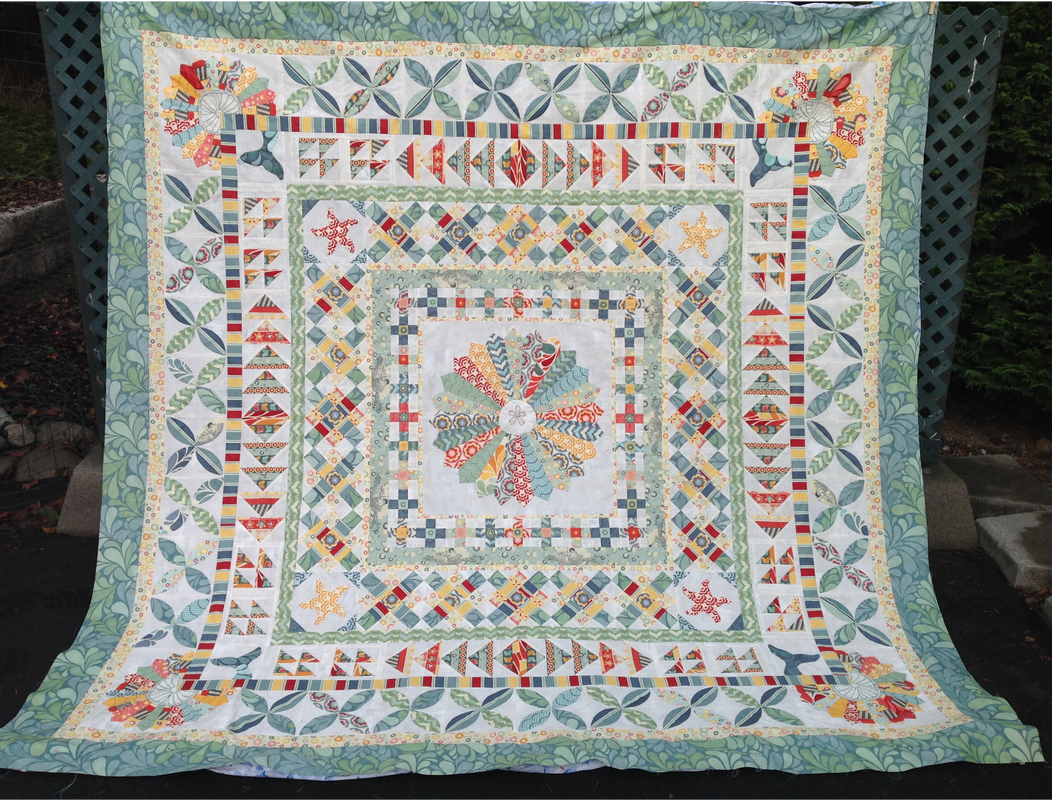 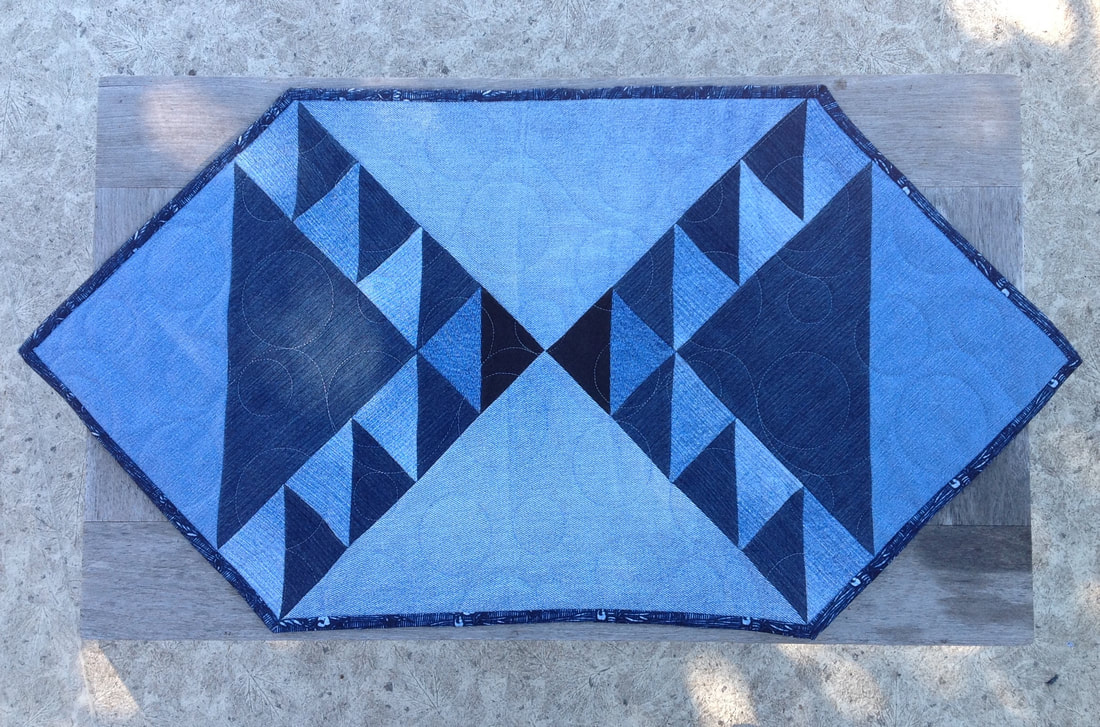 Pat requested instructions for this runner made with Lady of the Lake blocks and old jeans. It's very simple and I know I'm repeating myself but this block is fun to do. Thanks for writing Pat. Hope you have fun with it. Quilt will be made sometime in the future... from that big bin of denim under the cutting table. 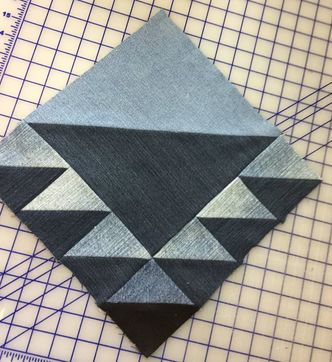 Lady of the Lake Block
Finishes at 12.5" and 12" when runner is complete. Each block is made up of 8 Half Square Triangles (HST). HST instructions not included here. Press seams open and press well as you go because denim seams are heavy. Cut 2 - 10" squares - 1 light, 1 contrast Make Half Square Triangles. Yield 2 HST from 2 squares. Trim and square to 9.5" Cut 8 - 4" squares - 4 light, 4 contrast Make Half Square Triangles. Yield 8. Trim and square to 3.5". You will use 7 for each block. I used black denim for extra contrast in the bottom center HST. Sew the 3.5" HSTs into 2 rows. One row = 3, one = 4. Sew rows to 9.5" HSTs. Cut 1 - 12.5" square light - sub cut in half on the diagonal. If your jeans legs aren't large enough to get a 12.5" square, use a 12.5" sq. ruler to cut triangles half at a time. You still might need a good sized leg. Triangles are cut larger to make sure points show when edge is finished. Sew one triangle to top and bottom of each block making 2 rows. Sew the rows together matching center seam. Trim outside of piece leaving a 1/4" seam allowance around entire edge. Press yet again to flatten seams as much as possible. Quilt as you like. I quilted this on the longarm using an overall pattern (jeans needle) and it didn't have a problem. Bind and enjoy. For runners, I like using really light weight Pellon fleece (can be found in interfacing area of some stores). My big sis suggested this instead of regular batting. Not sure of the weight but it seems like almost nothing. It helps keep runners flat and quilting shows nicely. When "the future" denim quilt is ready to be quilted, it will probably just be backed in flannel without batting. |


Archives
July 2023

|
||||||||||
 RSS Feed
Home The Pattern Store Robin's Blog Contact Copyright 2002-2024 Robin C. Nelson All rights reserved